
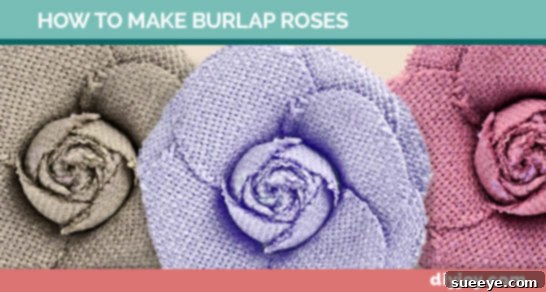
Master the Art of DIY Burlap Roses: Your Ultimate Step-by-Step Guide
Are you captivated by the rustic charm of burlap roses but find yourself thinking it might be too difficult to create them yourself? Think again! What might seem like a complex endeavor is, in fact, an incredibly straightforward and rewarding DIY project. With just a few simple materials and a clear guide, you can easily fashion beautiful burlap roses that will instantly elevate your country crafts, enhance your home decor, and add a unique, handmade touch to any gift.
Forget the notion of requiring hours of intricate work. This comprehensive tutorial will walk you through every step, ensuring you can create stunning, textured blooms in a surprisingly short amount of time – often just minutes per rose! Perfect for both beginners eager to explore new crafts and seasoned crafters looking for a quick and impactful project, these versatile fabric flowers are a testament to simple elegance and rustic beauty.
Why Choose Burlap Roses? The Enduring Appeal of Rustic Charm
The popularity of burlap roses isn’t just a fleeting trend; it’s rooted in their unique blend of aesthetic appeal and practical benefits. They offer a distinct texture, durability, and versatility that makes them a favorite among DIY enthusiasts and interior decorators alike. Here’s why these charming fabric flowers are an excellent choice for your next craft project:
- Unmatched Rustic Aesthetic: Burlap inherently brings a warm, earthy, and country-chic vibe to any setting. Its natural, coarse weave provides a unique texture that perfectly complements farmhouse, cottage, vintage, and bohemian decor styles.
- Remarkable Durability: Unlike fresh flowers that wilt and fade, burlap roses are incredibly durable. They maintain their beauty for years, making them ideal for long-lasting decor accents and cherished keepsakes. They are also much sturdier than delicate paper or silk flowers.
- Budget-Friendly Crafting: Burlap fabric is generally inexpensive and widely available at most craft and fabric stores. This makes it an economical choice for crafting multiple roses or undertaking large-scale decorative projects without breaking the bank.
- Incredibly Versatile: From elegant wedding decorations to everyday home accents, thoughtful gift embellishments, and unique fashion accessories, burlap roses fit seamlessly into a myriad of applications. Their neutral tone also makes them easy to integrate with various color schemes.
- Eco-Conscious Choice: As a natural fiber derived from the jute plant, burlap is biodegradable and environmentally friendly. Choosing burlap for your crafts aligns with sustainable practices, offering a guilt-free way to create beautiful things.
- Personalized Touch: Handmade items carry a special significance. Crafting your own roses allows for complete customization in terms of size, fullness, and potential embellishments. Each rose you create will be uniquely yours, reflecting your personal style.
Gather Your Tools & Materials: What You’ll Need to Begin Crafting
Before you embark on your creative journey, it’s essential to gather all the necessary tools and materials. Most items are readily available at any craft store, and some you might even have around your home. Being prepared ensures a smooth and enjoyable crafting experience.
- Burlap Fabric: A roll or a few yards of natural burlap is ideal. You can experiment with different weaves (finer for a more delicate rose, coarser for a more pronounced rustic look) or even explore colored burlap options to match specific themes or decor.
- Sharp Fabric Scissors: High-quality, sharp scissors are crucial for clean cuts and to minimize excessive fraying of the burlap. Dull scissors can make cutting frustrating and result in ragged edges.
- Hot Glue Gun & Glue Sticks: Your primary adhesive for securing the petals. A reliable hot glue gun will ensure quick and strong bonds. Always exercise caution when using a hot glue gun to prevent accidental burns.
- Optional: Felt Circles or Cardboard Scraps: Small circles of felt or thin cardboard are excellent for creating a stable, clean backing for your finished roses. This makes them easier to attach to other surfaces, such as wreaths or headbands.
- Optional: Floral Wire or Wooden Skewers: If you plan to create roses with stems for bouquets, arrangements, or planters, these will be necessary.
- Optional: Needle and Thread: While hot glue is generally sufficient for speed and ease, some crafters prefer to sew certain parts for extra security, especially for items that will endure heavy use.
- Optional: Embellishments: Buttons, lace trim, twine, pearl beads, small faux leaves, or even dried sprigs can add extra character and uniqueness to your finished burlap roses.
Step-by-Step Guide: Crafting Your Own Beautiful Burlap Roses
This tutorial will guide you through a popular and relatively simple method for creating natural-looking burlap roses by rolling and pleating. Once you master this core technique, you’ll be ready to experiment with countless variations.
Step 1: Preparing Your Burlap Strips
The foundation of your burlap rose begins with properly cut strips of fabric. The dimensions of your strips will directly influence the size and fullness of your final bloom.
- Measure and Cut: For a medium-sized rose (approximately 3-4 inches in diameter), begin by cutting a strip of burlap measuring about 2 to 3 inches wide and 25 to 30 inches long. For smaller, delicate roses, use narrower and shorter strips; for larger, statement roses, opt for wider and longer strips. Don’t worry excessively if the edges fray a little; this often enhances the rustic appeal.
- Consider Fraying: Burlap is known for its natural tendency to fray. You can embrace this for an even more authentic rustic look. If you prefer cleaner edges, you can apply a thin line of fabric sealant (like Fray Check) along the cut edges and allow it to dry before you begin. However, for most burlap rose designs, this step is entirely optional and often unnecessary.
Step 2: Forming the Center Bud of Your Rose
The heart of your burlap rose starts with a tightly rolled bud. This compact core will form the center from which the subsequent petals will beautifully unfurl.
- Fold the Edge: Take one end of your burlap strip and fold down a small corner diagonally, creating a triangular point. This will be the very tip of your rose’s center, mimicking the tightly closed bud.
- Roll Tightly: Begin rolling this folded end tightly along its length. As you roll, apply a very small dot of hot glue occasionally to secure the roll, especially at the very beginning. This ensures the center remains compact and well-formed. Continue rolling for about 1-2 inches, keeping the roll snug and consistent. This initial tight roll forms the innermost, most closed part of your rose.
Step 3: Creating the Petals by Folding and Pleating
This is where the magic happens, as you transform a simple strip of burlap into a series of beautiful, layered petals that give your rose its characteristic shape and volume.
- Fold Down the Strip: Once you have your tight center bud, take the remaining length of the burlap strip and fold it down towards you, roughly halfway or a little less than the full width of the strip. This creates a small flap or a “petal” edge along the top.
- Wrap and Glue: Carefully wrap this newly folded section around the central bud. As you wrap, gently gather and pleat the bottom edge of the burlap strip slightly. This subtle pleating is crucial for creating volume, dimension, and the natural, layered look of real rose petals. Secure the pleated bottom edge with a small dot of hot glue against the base of the rose, underneath the existing layers.
- Repeat the Process: Continue to fold, wrap, and pleat. With each new “petal” layer, vary the angle of your fold and the amount of pleating slightly. This variation is key to giving your rose a more organic, natural appearance, preventing it from looking too uniform or stiff. Some folds can be tighter, others looser; some pleats deeper, others shallower. Overlap the “petals” naturally, just as they would appear on a real rose.
- Build Layers: As you work your way outwards from the tight center, you can gradually start making the folds a bit larger and the pleats more pronounced. This technique mimics how a real rose’s outer petals are typically fuller and more open. Consistently apply hot glue to the base of the rose to secure each new layer of petals firmly in place. Continue until your rose reaches your desired size and fullness.
Step 4: Finishing Your Burlap Rose with Final Touches
Once you’re satisfied with the size and overall fullness of your rose, it’s time for the final touches to give it a polished and durable finish.
- Secure the End: When you reach the very end of your burlap strip, trim any excess fabric if necessary, leaving about an inch or two. Fold this raw end underneath the rose and secure it firmly to the back of the rose with a generous amount of hot glue. Ensure it’s neatly tucked away and firmly attached.
- Create a Sturdy Backing (Optional but Recommended): For a cleaner finish and enhanced durability, cut a small circle of felt or even another piece of burlap. This circle should be slightly smaller than the base of your rose. Hot glue this circle securely to the back of your finished rose. This provides a stable base, making it much easier to attach your rose to wreaths, hair clips, or any other project.
- Shape and Fluff: Gently cup your finished rose in your hands and delicately fan out the outer petals. You can gently pull and manipulate the fabric to give it a more open, voluminous, and lifelike shape. Don’t be afraid to adjust the petals slightly to achieve your desired aesthetic.
Expert Tips for Creating Perfect Burlap Roses Every Time
While the basic steps are straightforward, a few expert tips can help you achieve consistently beautiful and professional-looking burlap roses:
- Embrace the Fray: Don’t strive for absolute perfection in your cuts or worry about a little fraying. The natural, slightly frayed edges of burlap significantly contribute to its rustic charm and organic appeal.
- Control Your Glue: Use hot glue sparingly and strategically. Apply small dots primarily at the base of the petals and on the back of the rose. Too much visible glue can make the rose stiff and detract from its natural look.
- Practice Your Pleats: The key to a realistic, dimensional rose lies in varying your pleats. Experiment with different depths, angles, and frequencies of pleating to create a dynamic and natural flow in your petals.
- Vary Strip Widths for Depth: For a more complex and professional-looking rose, consider starting with a narrower strip for the inner, tighter petals and transitioning to wider strips for the outer, fuller petals. This creates a beautiful sense of depth.
- Safety First with Hot Glue: Always exercise extreme caution when operating a hot glue gun. Keep a bowl of cold water or an ice pack nearby in case of accidental burns, and ensure you work in a well-ventilated area.
- Consider Fabric Stiffener: If you want your roses to hold a very specific shape or be extra durable, a light spray of fabric stiffener or hairspray can help set the petals once the rose is complete.
Creative Applications: Where to Showcase Your Handmade Burlap Roses
The versatility of burlap roses is truly astounding. Once you start making them, you’ll discover endless opportunities to incorporate their rustic beauty into your life, enhancing everything from home decor to gifts and personal accessories.
For Home Decor & Seasonal Accents:
- Charming Wreaths: Adorn front door wreaths, interior wall wreaths, or even seasonal wreaths with clusters of burlap roses. They blend beautifully with greenery and other natural elements.
- Elegant Centerpieces: Combine burlap roses with mason jars, twine, lace, or distressed wood elements for stunning, rustic table centerpieces perfect for any occasion.
- Pillow Embellishments: Sew or hot glue a beautiful burlap rose onto a plain throw pillow for an instant farmhouse or country-chic update to your living space.
- Curtain Tie-Backs: Create unique and stylish curtain tie-backs by attaching burlap roses to lengths of twine or decorative ribbon.
- Garlands & Banners: String multiple burlap roses together, perhaps interspersed with wooden beads or small flags, to create a rustic garland for mantels, doorways, or party decorations.
- Framed Art: Arrange a collection of burlap roses on a piece of complementary fabric (like linen or lace) within a picture frame for unique, dimensional wall art.
For Gifts & Special Occasions:
- Unique Gift Toppers: Ditch the traditional bow! A handmade burlap rose adds a thoughtful, personal, and undeniably charming touch to any gift package.
- Wedding & Event Decor: Burlap roses are incredibly popular for rustic, country, or vintage-themed weddings. Use them in bouquets (bridal and bridesmaids), boutonnieres, corsages, aisle decorations, chair accents, table settings, and even as charming cake toppers.
- Party Favors: Attach a small burlap rose to your party favors or gift bags for a memorable and handcrafted takeaway for your guests.
- Scrapbooking & Card Making: Add dimension, texture, and a touch of rustic elegance to your scrapbooking layouts, handmade cards, and journals.
For Fashion & Personal Accessories:
- Hair Accessories: Glue a burlap rose to a hair clip, bobby pin, or headband for a charming, rustic hair accent that’s perfect for casual wear or special events.
- Brooches & Pins: Attach a simple pin back to the felt circle on your rose to create a unique brooch that can adorn jackets, scarves, sweaters, or bags.
- Apparel Embellishments: Spruce up a plain tote bag, a denim jacket, a hat, or even a pair of canvas shoes with a carefully placed burlap rose for a personalized touch.
Beyond the Basics: Explore Advanced Techniques & Variations
Once you’re comfortable with the basic burlap rose, don’t hesitate to experiment and infuse them with your unique creative flair. The possibilities for customization are endless!
- Combine Fabrics: Integrate other fabrics like lace, cotton muslin, denim strips, or even sheer organza with your burlap for multi-textured and visually interesting roses.
- Add Color & Embellishments: Use pre-dyed burlap for vibrant hues, or try painting/staining natural burlap with fabric paint, coffee, or tea dyes for a vintage or aged look. Embellish centers with buttons, pearls, rhinestones, or tiny clusters of twine.
- Distressing Techniques: Gently fray the edges more aggressively or lightly distress the burlap fabric (e.g., with sandpaper) for an even more rustic, aged, or shabby-chic appearance.
- Different Flower Shapes: Adapt the rolling and pleating technique to create other fabric flowers like simple rosettes, carnations, or even more complex layered blossoms.
- Layer with Leaves: Add faux or real dried leaves around the base of your burlap roses for a more complete and natural botanical look.
Conclusion: Unleash Your Inner Crafter with Beautiful Burlap Roses
Creating burlap roses is more than just a simple craft; it’s an opportunity to infuse your surroundings with handmade charm, rustic elegance, and a touch of your own personality. What might have seemed like a daunting task quickly transforms into an enjoyable and accessible project, allowing you to produce beautiful, durable, and highly versatile fabric flowers in mere minutes.
So, gather your materials, take a deep breath, and follow these simple steps. Prepare to be amazed by your own crafting capabilities and the delightful results you can achieve. Whether you’re enhancing your country-inspired decor, preparing a heartfelt DIY gift, adorning a special occasion, or simply enjoying the meditative process of creation, these burlap roses are sure to bring joy and beauty to every project. Start crafting today and watch your creative vision bloom!