
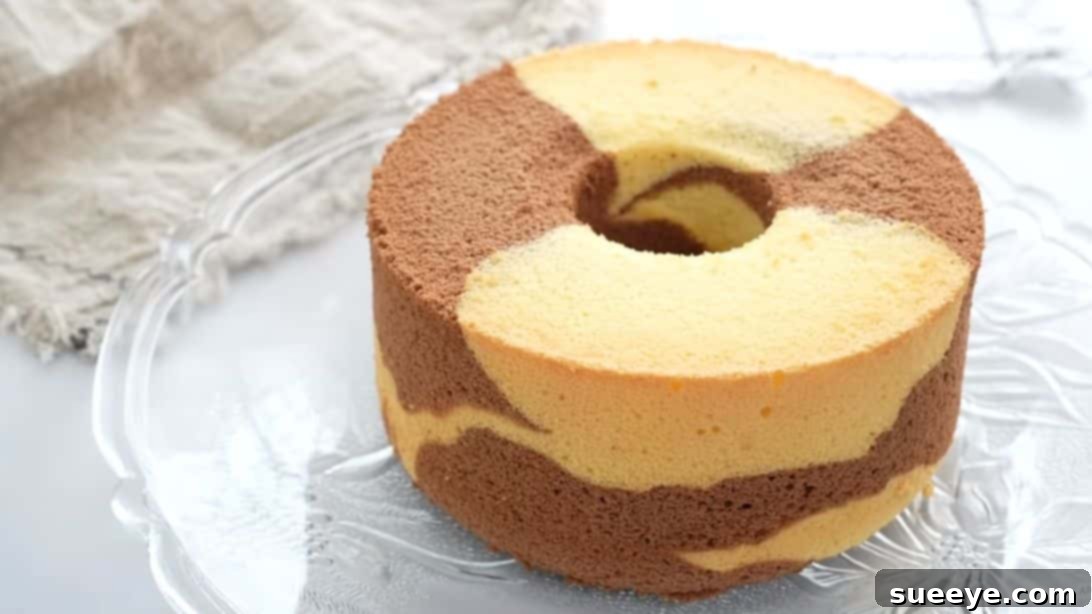
Prepare to be enchanted by the delicate balance of rich chocolate and bright, zesty orange in this exquisite chiffon cake. Renowned for its unparalleled lightness and cloud-like texture, a well-made chiffon cake is a true baking marvel, and this particular easy chocolate orange chiffon cake by Apron on YouTube promises to be a showstopper. It’s more than just a dessert; it’s an experience. Imagine taking a bite and being greeted by the vibrant aroma of fresh orange zest, perfectly complemented by the deep, comforting notes of cocoa. This cake isn’t just beautiful to behold with its elegant marble swirl; it’s also incredibly delicious, making it an ideal centerpiece for any party, gathering, or even a simple, luxurious treat for yourself. We’ll guide you through each step to ensure you achieve a perfectly fluffy, moist, and utterly irresistible cake every time.
Chiffon cakes stand apart from other cakes due to their unique use of both baking powder (or baking soda) and a meringue (whipped egg whites). This combination is what gives them their characteristic airy, spongy texture, making them incredibly light yet satisfyingly moist. The addition of vegetable oil, rather than butter, contributes to its tenderness and ensures it remains soft even when chilled. Our chocolate orange variation elevates this classic to new heights, offering a refreshing citrus counterpoint to the decadent chocolate. Get ready to embark on a baking journey that culminates in a truly spectacular dessert, perfect for impressing guests or simply indulging your sweet tooth.
Ingredients for Your Fluffy Chocolate Orange Chiffon Cake
Gathering all your ingredients before you begin is a crucial step in ensuring a smooth and enjoyable baking process. For this exquisite chocolate orange chiffon cake, you’ll need two separate bowls for your eggs, as precise separation is key to the cake’s structure. Ensure all your ingredients are at room temperature unless otherwise specified, as this helps them combine more smoothly and contributes to a more uniform batter.
- Eggs: 4 large eggs (yolks and whites carefully separated into two distinct bowls). Egg whites form the crucial meringue for lift, while yolks provide richness and moisture.
- Sugar (Yolk Mixture): 1.5 tablespoons of granulated sugar. This sweetens the yolk base and helps create a stable emulsion.
- Vegetable Oil: 1/4 cup. Essential for a moist, tender crumb characteristic of chiffon cakes, contributing to its light texture without the heaviness of butter.
- Orange Zest: Zest of 1 medium orange. Provides a bright, aromatic burst of fresh citrus flavor. Use a fine grater or microplane for best results, avoiding the bitter white pith.
- Orange Juice: 2.7 oz (approximately 1/3 cup plus 1 tablespoon). Freshly squeezed is recommended for the most vibrant flavor. This liquid component adds moisture and tang.
- Cake Flour: 3/4 cup. Specifically chosen for its lower protein content, which results in a softer, more delicate, and tender cake crumb. Avoid substituting with all-purpose flour if possible, or adjust accordingly.
- Cornstarch: 1.5 tablespoons. This fine starch helps tenderize the cake further and contributes to its ultra-soft texture, particularly in the orange portion.
- Cocoa Powder: 1.5 tablespoons. Unsweetened cocoa powder provides the rich chocolate flavor and beautiful dark hue to one half of the batter.
- Lemon Juice (Meringue): 1 teaspoon. A small amount of acid helps stabilize the egg whites, allowing them to whip up to their full volume and achieve firm peaks.
- Sugar (Meringue): 1/3 cup of granulated sugar. Gradually added to the egg whites, it creates a stable, glossy meringue that gives the cake its signature lift and airy texture.
Step-by-Step Guide: Crafting Your Perfect Chocolate Orange Chiffon Cake
Follow these detailed instructions carefully to ensure your chocolate orange chiffon cake turns out perfectly airy, moist, and bursting with flavor. Precision and gentle handling are key to mastering this delicate dessert.
Step 1: Preparing the Flavorful Yolk Base
In the bowl containing your separated egg yolks, add 1.5 tablespoons of granulated sugar. Using a whisk, beat the mixture vigorously until the sugar is fully dissolved and the yolks appear lighter in color and slightly thickened. This process creates an emulsified base that holds air and contributes to the cake’s structure. Next, pour in 1/4 cup of vegetable oil. The oil is crucial for the chiffon cake’s characteristic moist and tender crumb, providing richness without density. Immediately follow with the aromatic zest of 1 orange, ensuring you only grate the vibrant orange part and avoid the bitter white pith. Finally, add 2.7 oz (approximately 1/3 cup plus 1 tablespoon) of fresh orange juice. Stir all these ingredients together until they are thoroughly combined and you have a smooth, well-integrated liquid mixture. This forms the foundation of your cake’s delightful flavor profile.
Step 2: Sifting the Flour and Dividing the Batter
To ensure a super-fine, lump-free batter, carefully sift 3/4 cup of cake flour directly into your prepared yolk mixture. Sifting not only removes any potential lumps but also aerates the flour, which contributes to a lighter cake. Once the flour is added, gently whisk the mixture. The goal here is to combine the ingredients just until no dry streaks of flour remain, being careful not to overmix. Overmixing can develop the gluten in the flour, leading to a tougher cake. Once you have a smooth, consistent batter, evenly divide this base mixture into two separate bowls. This division is essential for creating your distinct orange and chocolate layers.
Step 3: Infusing Flavors: Creating Orange and Chocolate Batters
Now, it’s time to transform your base batter into its two delicious variations. In one of the divided portions of batter, sift in 1.5 tablespoons of cornstarch. Cornstarch is a secret ingredient in many delicate cakes, contributing to an even softer, more tender crumb. Gently mix this portion until the cornstarch is fully incorporated, ensuring a uniform texture. Set this orange-flavored batter aside. For the other portion of batter, sift in 1.5 tablespoons of unsweetened cocoa powder. Cocoa powder not only adds a rich chocolate flavor but also a beautiful dark color. Whisk this mixture thoroughly until the cocoa powder is completely blended in and no streaks remain. Take care not to overmix here either. Once both batters are prepared, set them aside. You now have two distinct, flavorful batters ready for the next crucial step.
Step 4: Mastering the Meringue: Whipping Egg Whites to Perfection
This is arguably the most critical step for achieving a truly airy chiffon cake. In the bowl with your egg whites, add 1 teaspoon of fresh lemon juice. The lemon juice acts as a stabilizer, helping the egg whites whip up to their maximum volume and maintain their structure. Using either a hand mixer or a stand mixer fitted with a whisk attachment, begin whisking the egg whites on medium speed. As the egg whites start to become foamy and opaque, gradually begin adding the 1/3 cup of granulated sugar, one tablespoon at a time, while continuing to whisk. It’s important to add the sugar slowly to allow it to dissolve properly and prevent the meringue from becoming grainy. Continue beating on medium to medium-high speed until the egg whites reach firm peaks. This means when you lift the whisk, the peak of the meringue stands upright and holds its shape without collapsing. The meringue should be glossy and smooth, not dry or curdled. A perfectly whipped meringue is the backbone of your chiffon cake’s incredible lift and lightness.
Step 5: Gently Folding in the Meringue for Ultimate Airiness
With your magnificent meringue ready, it’s time to incorporate it into your two prepared batters. This step requires a gentle touch to preserve the precious air you’ve whipped into the egg whites. Add approximately half of the meringue (equal amounts) into each of your two batters – the orange-cornstarch batter and the chocolate-cocoa batter. Using a spatula, gently fold the meringue into each batter. The technique involves cutting down through the middle of the batter, then sweeping the spatula across the bottom of the bowl and folding the batter over the meringue. Rotate the bowl and repeat. Continue folding just until the meringue is fully incorporated and no white streaks remain. Avoid overmixing, as this will deflate the meringue and result in a dense cake. The goal is to maintain as much air as possible, ensuring your chiffon cake achieves its signature light and airy texture.
Step 6: Creating the Marble Swirl and Preparing for Baking
Now for the artistic part! Take an 8-inch round chiffon cake pan (the kind with a removable bottom and often a tube in the center, and crucially, ungreased). Begin by pouring a small amount of your orange batter into the bottom of the pan. Don’t spread it too thin. Immediately follow this with an equal amount of the chocolate batter, pouring it directly on top of the orange batter, or slightly off-center. Continue this alternating pattern, layering small portions of orange and chocolate batter until both bowls are empty and all the batter is used. The goal is to create beautiful, distinct layers that will form a lovely marble pattern when sliced. Once all the batter is in the pan, gently thump the pan a few times on your countertop. This helps to release any large air bubbles trapped within the batter, which can prevent uneven baking or large holes in your finished cake. Avoid tapping too vigorously, as this can deflate the batter.
Step 7: Baking to Golden Perfection and Proper Cooling
Preheat your oven to 160 degrees C (320 degrees F). Once preheated, carefully place your filled cake pan in the lower middle rack of the oven. Baking in the lower middle ensures even heat distribution and helps the cake rise steadily without burning the top too quickly. Bake for approximately 40 to 45 minutes. The exact baking time can vary depending on your oven, so keep an eye on it. The cake is done when a wooden skewer or toothpick inserted into the center comes out clean, and the top springs back lightly when gently touched. The top should also be a beautiful golden-brown. Once baked, remove the cake from the oven immediately. This next step is crucial for chiffon cakes: invert the cake pan, placing it upside down on a cooling rack or using the pan’s feet if it has them. This prevents the cake from collapsing on itself and maintains its lofty height and airy texture as it cools. Allow the cake to cool completely in this inverted position, which can take an hour or two. Patience is key! Once fully cooled, carefully run a thin knife or spatula around the edges of the pan and the inner tube (if applicable) to release the cake. Transfer it to a serving plate, slice, and serve this delightful chocolate orange chiffon cake. Enjoy every fluffy, flavorful bite!
Baking Tips for a Flawless Chocolate Orange Chiffon Cake
Chiffon cakes are delicate, but with a few extra tips, you can ensure a successful bake every time:
- Room Temperature Eggs: This is vital! Room temperature egg whites whip up with greater volume and stability, leading to a much airier meringue and ultimately a lighter cake. Egg yolks also emulsify better at room temperature.
- Don’t Grease the Pan: Unlike most cakes, chiffon cakes require an ungreased pan. The batter needs to cling to the sides of the pan to climb and achieve its characteristic height. Greasing will cause it to slip and shrink.
- Proper Meringue Consistency: Achieving firm, glossy peaks is essential. Under-whipped whites won’t provide enough lift, while over-whipped whites can become dry and crumbly, making them difficult to fold.
- Gentle Folding: Always use a light hand when incorporating the meringue into the batter. This is where the air you’ve worked so hard to create is preserved. Fold just until no white streaks remain.
- No Peeking: Avoid opening the oven door too frequently during baking, especially in the first 20-30 minutes. Sudden temperature drops can cause the cake to collapse.
- Cooling Upside Down: This step is non-negotiable for chiffon cakes. It prevents the delicate structure from compressing under its own weight as it cools, maintaining its impressive height and airy texture.
- Use a Chiffon Pan: While an 8-inch round pan is specified, a classic chiffon pan (tube pan with a removable bottom and often little “feet”) is ideal. Its design helps the cake rise evenly and cool efficiently upside down.
Variations & Serving Suggestions for Your Chiffon Delight
While this chocolate orange chiffon cake is perfect as is, you can always get creative:
- Glazes and Frostings: A simple orange zest glaze (powdered sugar, orange juice, and zest) or a light chocolate ganache would complement the flavors beautifully without overpowering the cake’s delicate texture. Whipped cream is also a classic, light accompaniment.
- Add-ins: Consider folding in mini chocolate chips or candied orange peel into the chocolate batter for extra texture and flavor bursts.
- Other Citrus: Experiment with lemon or lime zest and juice for a different citrus twist, though the chocolate-orange combination is truly special.
- Serving: This cake is best served at room temperature. It pairs wonderfully with a cup of coffee or tea, or as a light dessert after a rich meal. Garnish with fresh orange slices or a dusting of cocoa powder for an elegant presentation.
Frequently Asked Questions (FAQ) About Chiffon Cake
Here are some common questions bakers have when making chiffon cakes:
- Q: My chiffon cake collapsed after baking. What went wrong?
- A: This is a common issue! It’s usually due to one of a few reasons: the cake wasn’t fully baked (center was still wet), the meringue was under-whipped (not firm enough peaks), or it wasn’t inverted immediately after baking to cool. Ensure your oven temperature is accurate and that the cake passes the toothpick test.
- Q: Can I use all-purpose flour instead of cake flour?
- A: While cake flour is highly recommended for its low protein content which yields a tender crumb, you can substitute it with all-purpose flour. For every cup of all-purpose flour, remove 2 tablespoons and replace with 2 tablespoons of cornstarch (then sift together). However, the texture might not be as delicate as with pure cake flour.
- Q: Why can’t I grease my chiffon cake pan?
- A: Chiffon cake batter needs to “climb” the sides of the pan as it bakes to achieve its characteristic height and airy texture. If the pan is greased, the batter has nothing to grip onto and will slip down, resulting in a shorter, denser cake.
- Q: How should I store leftover chiffon cake?
- A: Chiffon cake is best stored at room temperature, loosely covered, for up to 2-3 days. If it’s very humid, or if you’ve added a perishable frosting, it’s better to store it in the refrigerator. Always bring it back to room temperature before serving for the best texture and flavor.
- Q: My marble swirl didn’t look very distinct. How can I improve it?
- A: The key to a good marble swirl is to alternate pouring small, distinct dollops of each batter, rather than pouring in large, even layers. You can also gently swirl a knife once or twice through the batter in the pan, but be careful not to overmix, which would blend the colors too much.
Indulge in the Ultimate Chocolate Orange Chiffon Cake Experience
There’s something truly magical about baking a chiffon cake, and this chocolate orange version takes that magic to a whole new level. The combination of its incredibly light, airy texture with the vibrant burst of orange and the comforting richness of chocolate makes it an unforgettable dessert. This recipe, inspired by Apron, is designed to guide you seamlessly through the process, ensuring that even if you’re new to chiffon cakes, you’ll achieve stunning results. Perfect for celebrations, a delightful treat for your family, or simply a moment of pure culinary bliss, this cake is a testament to the fact that homemade desserts are always the best. So, don your apron, gather your ingredients, and prepare to create a masterpiece that will undoubtedly impress and delight everyone who takes a bite. Happy baking!