
Unlock Relaxation & Savings: The Ultimate DIY Bath Bomb Guide
Imagine sinking into a warm, fragrant bath after a long, demanding day. The water fizzes gently, releasing soothing essential oils and vibrant colors, melting away your stress and leaving your skin feeling incredibly soft. This isn’t just a dream; it’s an achievable reality with the magic of DIY bath bombs. Far from being a luxury reserved for expensive spa trips or high-end beauty stores, crafting your own bath bombs at home is surprisingly simple, incredibly rewarding, and a fantastic way to indulge in self-care without breaking the bank.
Whether you’re an adult seeking a moment of peace, a parent looking for a fun and engaging craft project with your children, or someone on the hunt for the perfect personalized gift, homemade bath bombs are the answer. They cater to everyone, sparking fascination in kids with their vibrant fizz, and offering adults a much-needed escape into tranquility. This guide will walk you through everything you need to know to create your own batches of these delightful effervescent wonders.
Why Choose DIY Bath Bombs Over Store-Bought?
The allure of a good bath bomb is undeniable, but the cost can quickly add up. Brands like Lush offer fantastic products, but frequent purchases can become a significant expense. This is precisely where the beauty of making your own comes into play. DIY bath bombs offer a compelling array of advantages:
- Significant Cost Savings: The ingredients for multiple homemade bath bombs often cost less than a single premium store-bought one. Over time, these savings truly make a difference, allowing you to enjoy luxurious baths more frequently.
- Complete Customization: This is arguably the biggest benefit. You’re in control of every element. Choose your favorite essential oils for specific aromatherapy benefits (think relaxing lavender, invigorating peppermint, or uplifting citrus). Select colors that match your mood, or add natural elements like dried flower petals for an extra touch of elegance.
- Known & Natural Ingredients: When you craft your own, you know exactly what’s going into your bath. This is particularly beneficial for those with sensitive skin or who prefer to avoid artificial fragrances, dyes, or harsh chemicals often found in commercial products. You can opt for skin-nourishing carrier oils and pure essential oils.
- Therapeutic Benefits: Beyond just a pleasant scent, essential oils offer genuine therapeutic properties. Epsom salts, a common bath bomb ingredient, are renowned for their muscle-relaxing and detoxifying qualities. Carrier oils like coconut or almond oil hydrate and soften the skin, turning your bath into a moisturizing treatment.
- A Fun & Creative Outlet: The process of making bath bombs is a joy in itself. It’s a creative endeavor that allows you to experiment with different combinations, colors, and molds. It’s also a fantastic activity to share with family and friends, making memories while creating something beautiful.
- Eco-Friendly Potential: By making your own, you reduce packaging waste associated with store-bought products, contributing to a more sustainable lifestyle.
The Essential Ingredients for Your Perfect Bath Bomb
Crafting effective and delightful bath bombs relies on a handful of key ingredients, each playing a crucial role in the final product. Understanding these components will empower you to experiment and create your ideal bath experience. While specific recipes vary, the core elements remain consistent:
Primary Dry Ingredients:
- Baking Soda (Sodium Bicarbonate): This is the foundation of your bath bomb. It creates the primary fizzing reaction when combined with citric acid and introduced to water. It also has natural softening properties for the skin.
- Citric Acid: The other half of the fizzing equation. When baking soda and citric acid meet water, they react to produce carbon dioxide gas, creating the signature effervescence.
- Epsom Salts (Magnesium Sulfate): Valued for their therapeutic benefits, Epsom salts help relax muscles, soothe aches, and reduce inflammation. They’re a wonderful addition for a truly restorative bath.
- Cornstarch (or Arrowroot Powder): This ingredient acts as a binder, helping to hold the bath bomb together, and also slows down the fizzing reaction slightly, making it last longer. It also contributes to a silky feel in the bathwater.
Primary Wet Ingredients:
- Carrier Oil (e.g., Coconut Oil, Almond Oil, Jojoba Oil): These oils are essential for binding the dry ingredients together and providing moisturization for your skin. Choose an oil that suits your skin type and preference. Melted coconut oil is a popular choice due to its accessibility and benefits.
- Essential Oils: This is where the magic of aromatherapy comes in. Select high-quality essential oils based on your desired effect. Lavender is classic for relaxation, peppermint can be uplifting, eucalyptus is great for clearing the mind, and citrus oils (lemon, orange) are wonderfully invigorating. Always research proper dilution and safety guidelines for essential oils.
- Liquid Colorant (Optional): Food coloring, mica powder, or natural colorants like spirulina or beetroot powder can be used to add a vibrant hue to your bath bombs. Mica powders are often preferred for their shimmer and less likelihood of staining the tub.
- Witch Hazel (in a spray bottle): This is used sparingly as a binder to achieve the perfect consistency for molding. Too much liquid will activate the fizz prematurely, so a fine mist is ideal.
A Simple Overview of the Bath Bomb Creation Process
While an actual step-by-step recipe with precise measurements is best followed from a dedicated tutorial (there are many fantastic ones available online!), understanding the general flow of the process will give you confidence to start:
- Gather Your Tools: You’ll need mixing bowls, a whisk, measuring cups and spoons, a spray bottle for witch hazel, and molds. For molds, you don’t need fancy equipment; plastic Easter eggs, cut tennis balls, or even silicone cupcake molds work wonderfully. Get creative with what you have!
- Combine Dry Ingredients: In a large bowl, thoroughly whisk together your baking soda, citric acid, Epsom salts, and cornstarch. Ensure there are no lumps and everything is well-distributed.
- Mix Wet Ingredients: In a separate smaller bowl, combine your melted carrier oil, essential oils, and any liquid colorants. Whisk these until fully blended.
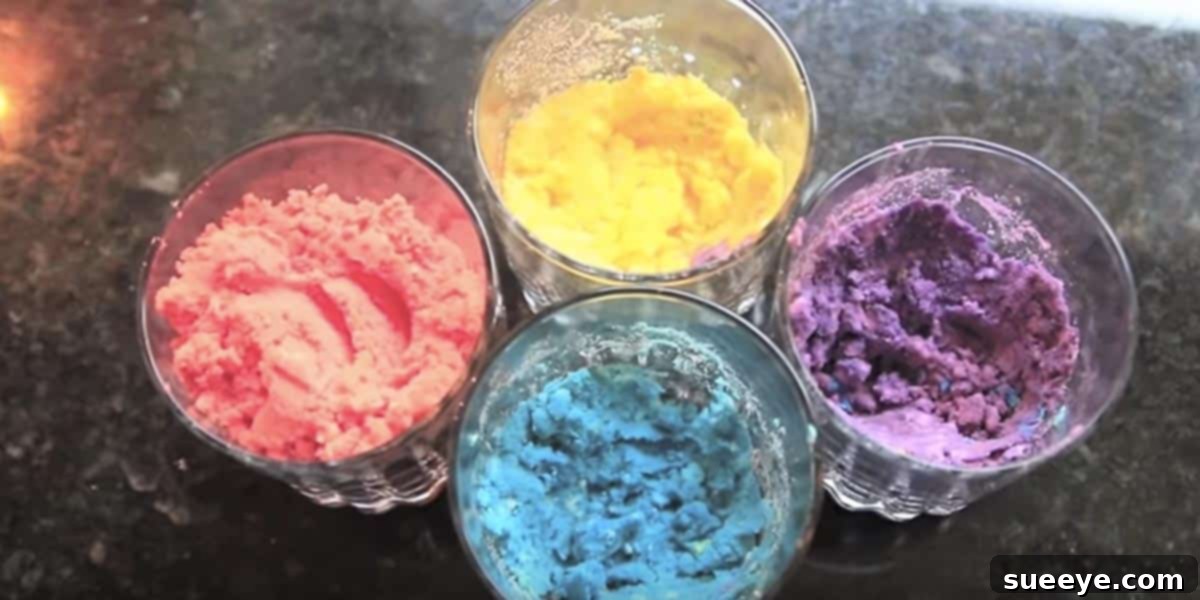
- Carefully Combine: Slowly add the wet ingredients to the dry ingredients, mixing continuously. You might notice a slight fizzing if too much liquid is added too quickly. The goal is a consistency similar to damp sand – it should hold its shape when squeezed.
- Mist with Witch Hazel: If the mixture is too crumbly, lightly mist it with witch hazel from a spray bottle, mixing after each spray, until it reaches the desired damp sand consistency. Be very cautious not to add too much liquid.
- Press into Molds: Firmly pack the mixture into your chosen molds. If using two-part sphere molds, slightly overfill both halves and then press them together, twisting gently to seal.
- Allow to Dry & Harden: This is a crucial step! Let your bath bombs dry in their molds (or carefully remove them if using sturdy molds like silicone) in a dry, cool place for at least 24-48 hours. This allows them to harden properly, preventing them from crumbling later.
Endless Customization: Make Your Bath Bombs Truly Yours
The beauty of DIY extends far beyond basic ingredients. This is where your creativity can truly shine, transforming a simple bath bomb into a personalized aromatherapy experience or a breathtaking gift:
- Scent Sensations:
- Relaxing: Lavender, Chamomile, Ylang Ylang, Bergamot.
- Uplifting/Energizing: Sweet Orange, Lemon, Grapefruit, Peppermint.
- Soothing/Muscular: Eucalyptus, Tea Tree, Rosemary.
- Exotic: Patchouli, Sandalwood, Jasmine.
- Color Creations: Experiment with different food colorings (gel or liquid), cosmetic-grade mica powders for a shimmery effect, or even natural powders like turmeric for yellow, spirulina for green, or beetroot powder for pink.
- Botanical Boosts: Incorporate dried flower petals like rose, calendula, or lavender buds for an elegant visual appeal and added natural fragrance. Just be mindful that these will need to be cleaned from the tub after your bath.
- Skin-Loving Additions:
- Oatmeal: For sensitive or irritated skin, finely ground colloidal oatmeal can be a wonderful, soothing addition.
- Clay: Bentonite clay or Kaolin clay can add detoxifying properties and a silky feel.
- Shea or Cocoa Butter: A small amount can further boost the moisturizing power of your bath bombs, leaving skin feeling even more supple.
- Playful Surprises: For kids (or the young at heart!), embed a small, waterproof toy inside the bath bomb. As it fizzes, the toy will be revealed, adding an element of delightful surprise.
DIY Bath Bombs: The Ultimate Thoughtful Gift
Struggling to find a unique, personalized gift that truly shows you care? Look no further! Homemade bath bombs are an absolute winner for almost any occasion. They are personal, luxurious, and infinitely more meaningful than a generic store-bought item. Because they are so pricey to buy individually, receiving a handmade batch feels like a truly special treat.
They make fantastic gifts for:
- Birthdays and Holidays: Create custom scents and colors to match the recipient’s personality or the season.
- Teacher Appreciation: A small token of relaxation for hard-working educators.
- Hostess Gifts: A lovely way to thank someone for their hospitality.
- Bridal Showers or Baby Showers: A soothing gift for soon-to-be brides or new mothers.
- Just Because: Sometimes, the best gifts are given for no particular reason other than to show someone you’re thinking of them.
Package them beautifully in cellophane bags with ribbons, small gift boxes, or decorative jars, and you have a high-end looking gift at a fraction of the cost. Don’t forget to include a small tag listing the ingredients and scents!
A Family-Friendly Craft Project
Don’t just keep this fun project to yourself! Making bath bombs is a fantastic activity for kids of all ages. My teenage daughter, who once bugged me endlessly to visit expensive beauty stores, now loves crafting her own. It’s a hands-on experience that combines creativity with a touch of science. Children are utterly fascinated by the fizzing reaction, making it an engaging way to learn about chemical reactions in a safe and fun environment.
From choosing colors to pressing the mixture into molds, every step offers a chance for kids to participate and express their imagination. It’s a wonderful opportunity for quality family time, resulting in a product everyone can enjoy. Plus, they’ll have the added satisfaction of using something they made themselves!
Tips for Success and Storage
To ensure your bath bomb making journey is smooth and successful, keep these tips in mind:
- Humidity is Your Enemy: Moisture in the air can activate your bath bombs prematurely. Choose a dry day to make them and store finished bombs in airtight containers away from humidity.
- Proper Consistency is Key: The “damp sand” texture is crucial. Too dry, and they’ll crumble; too wet, and they’ll fizz up. Err on the side of slightly drier and add witch hazel very gradually.
- Pack Firmly: When pressing into molds, really pack the mixture in tightly. This helps them hold their shape and stay solid.
- Patience with Drying: Don’t rush the drying process. A full 24-48 hours (or even longer in humid climates) ensures your bath bombs are hard and durable.
- Storage: Once fully dry, store your bath bombs in airtight containers or individually shrink-wrapped to protect them from moisture and preserve their scent.
Embrace the Art of Homemade Relaxation
There’s truly no better way to end a day than with a warm, indulgent bath, elevated by a beautifully crafted, homemade bath bomb. It’s a simple luxury that offers profound benefits – melting away stress, nourishing your skin, and providing a moment of pure, unadulterated relaxation. By choosing to make your own, you’re not just saving money; you’re investing in self-care, creativity, and the joy of a personalized spa experience right in your own home.
So, gather your ingredients, unleash your creativity, and prepare to embark on a delightful journey into the world of DIY bath bombs. Your skin will thank you, your wallet will thank you, and your mind will certainly thank you for those moments of peaceful escape. Don’t keep this amazing secret to yourself – share this guide with your friends and family on Facebook and inspire them to discover the magic of homemade bath bombs too!