
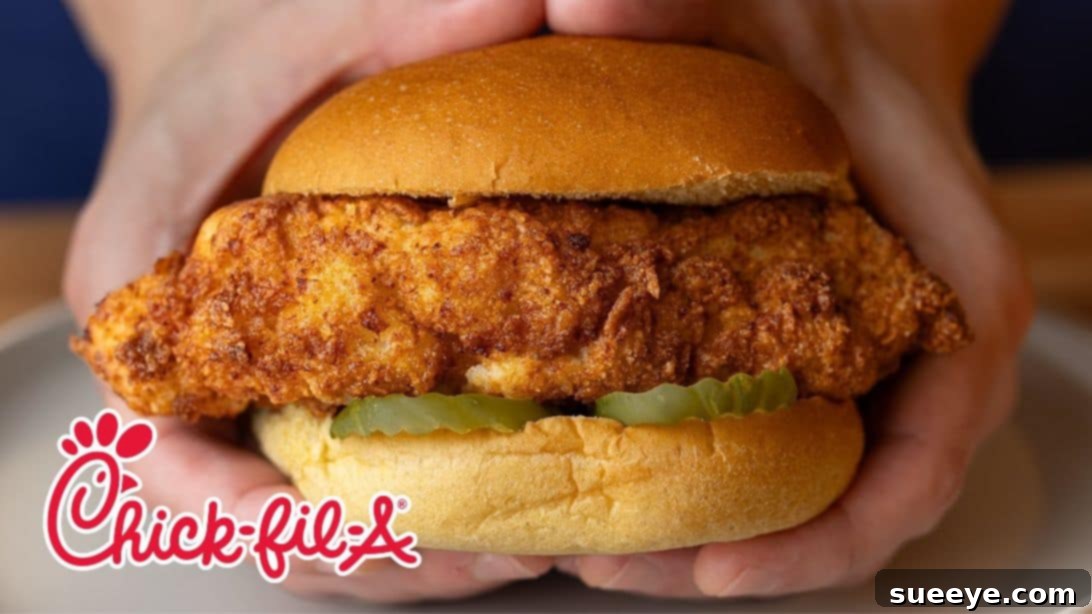
Mastering the Copycat Chick-fil-A Chicken Sandwich: Your Ultimate Homemade Guide
For countless enthusiasts, the Chick-fil-A Chicken Sandwich isn’t just a meal; it’s an experience. The perfectly seasoned, incredibly juicy chicken breast, crisp dill pickles, and soft, buttery bun create a symphony of flavors and textures that has captivated palates nationwide. But what if you could recreate this iconic taste in your own kitchen? Thanks to dedicated culinary explorers like Jason Farmer, crafting a homemade version that rivals, or even surpasses, the original is entirely within reach.
This comprehensive guide delves into a meticulous copycat recipe designed to capture every beloved element of the Chick-fil-A classic. From the critical brining process that ensures unparalleled tenderness and flavor, to the unique seasoned breading that delivers that signature crispy exterior, we’ll walk you through each step. Prepare to elevate your home cooking and impress your family and friends with a chicken sandwich that embodies the very essence of Chick-fil-A perfection.
RELATED: Copycat Chick-Fil-A Nuggets Recipe With Sauce
The true magic behind this sandwich lies in a few key techniques, chief among them being the brining of the chicken. This essential step, though requiring several hours, is non-negotiable for achieving meat that is not only juicy but also deeply flavorful and tender from edge to center. Skipping the brine will result in a drier, less impactful chicken breast, a deviation from the moist perfection we aim for. Beyond the brine, meticulous attention to the seasoned coater is paramount. This unique blend of ingredients contributes to the distinct texture and taste that makes this copycat recipe truly special. For a visual and in-depth walkthrough, be sure to refer to the accompanying video tutorial from Jason Farmer.
Here’s another recipe for you to try: Crockpot Dill Pickle Chicken Recipe
Essential Ingredients for Your Homemade Chick-fil-A Chicken Sandwich
Crafting the perfect copycat Chick-fil-A sandwich requires a thoughtful selection of ingredients, each playing a vital role in replicating the iconic taste and texture. While some components are straightforward, others require specific measurements and types to achieve authentic results. Most of these items are readily available at your local grocery store, making this gourmet experience accessible to any home cook.
For the Main Sandwich Assembly:
- Boneless Skinless Chicken Breasts: The foundation of our sandwich. Opt for fresh, high-quality breasts, ideally around 4-6 ounces each after filleting, to ensure even cooking.
- Brioche Hamburger Buns: These rich, slightly sweet, and incredibly soft buns are crucial. Their delicate texture and hint of sweetness perfectly complement the savory chicken and tangy pickles.
- Butter: Used for toasting the buns, butter adds a luxurious richness and a golden-brown crispness that prevents sogginess and enhances flavor.
- Dill Pickles: The classic Chick-fil-A sandwich features simple, yet essential, dill pickle slices. Their sharp, briny crunch cuts through the richness of the chicken, providing a delightful contrast.
- Peanut Oil: Ideal for frying due to its high smoke point and neutral flavor, ensuring your chicken fries to a beautiful golden crisp without imparting unwanted tastes.
For the Game-Changing Chicken Brine:
The brine is the secret weapon for incredibly juicy and flavorful chicken. It tenderizes the meat and infuses it with seasoning.
- Morton’s Coarse Kosher Salt: (1/4 cup + 2 teaspoons, approximately 67.2 grams) Essential for its precise salinity, which penetrates the chicken to lock in moisture and flavor. Note: If using regular table salt, reduce to 3 tablespoons + 2 1/4 teaspoons as it’s much finer and more potent.
- Granulated Sugar: (1/2 cup) Balances the saltiness, aids in browning during frying, and adds a subtle sweetness.
- Paprika: (1 tablespoon) Contributes a mild, sweet pepper flavor and a beautiful reddish hue to the brine.
- Coarse Ground Black Pepper: (1/4 teaspoon) Provides a classic, pungent warmth.
- Mustard Powder: (1 teaspoon) Adds a subtle, savory tang and complexity that is a hallmark of the Chick-fil-A flavor profile.
- Water: (4 cups + 3 tablespoons + 2 teaspoons) The liquid base for dissolving the brine ingredients and submerging the chicken.
For the Essential Milk Wash:
This simple mixture acts as the adhesive for the seasoned coater, ensuring a thick, even crust.
- Skim Milk: (1 cup) Provides the liquid base for the wash.
- Eggs: (2 large) Act as a binder, helping the coater adhere firmly to the chicken.
For the Signature Seasoned Coater:
This carefully balanced blend is what gives the Chick-fil-A sandwich its distinctive crispy, craggy texture and savory taste.
- All-Purpose Flour: (1 cup) The primary structural component of the breading.
- Granulated Sugar: (1 tablespoon + 1 teaspoon) Enhances browning and provides a subtle counterpoint to the savory spices.
- Morton’s Coarse Kosher Salt: (3/4 teaspoon + a pinch) Crucial for seasoning the breading itself, ensuring every bite is flavorful.
- MSG (Monosodium Glutamate): (1 teaspoon) A key ingredient for amplifying the umami flavor, delivering that addictive savory depth.
- Non-Fat Milk Powder: (1 tablespoon + 1 teaspoon) Adds richness, aids in browning, and contributes to the overall texture and flavor complexity.
- Baking Powder: (3/4 teaspoon) Helps create a lighter, crispier breading with a slightly airy texture.
- White Pepper: (1/4 teaspoon) Offers a milder, more subtle heat than black pepper, characteristic of the original sandwich.
- Mustard Powder: (1 teaspoon) Reinforces the savory tang established in the brine.
- Cayenne Pepper: (A pinch) Provides a very subtle background warmth without making the sandwich overtly spicy.
- Milk Wash: (2 to 3 tablespoons) A small amount is incorporated directly into the dry coater to create characteristic “crumbs” or “flakes.”
Crafting Your Copycat Chick-fil-A Chicken Sandwich: Step-by-Step Instructions
Creating this iconic sandwich at home is a rewarding culinary adventure. Follow these detailed steps carefully to achieve a flavor and texture that truly stands out.
Step 1: Prepare the Flavor-Infusing Brine
In a generously sized bowl or container, combine all the dry brine ingredients: kosher salt, granulated sugar, paprika, black pepper, and mustard powder. Mix thoroughly with a whisk until they are evenly distributed. Next, pour in the specified amount of water. Continue mixing until all the salt and spices have completely dissolved. This ensures a consistent brine that will uniformly penetrate the chicken. Set this mixture aside, ready for the chicken.
Step 2: Whisk Up the Milk Wash
In a separate medium bowl, crack the two eggs and add the skim milk. Whisk these two ingredients vigorously until they are thoroughly combined and no streaks of egg yolk remain. The milk wash acts as a crucial binder for the breading, so proper mixing ensures even adhesion. Set this bowl aside.
Step 3: Craft the Signature Seasoned Coater
Begin by sifting the all-purpose flour into a large, wide bowl. Sifting helps to aerate the flour and prevent clumps, which is important for a smooth, even coating. Add all the remaining dry ingredients for the seasoned coater: granulated sugar, kosher salt, MSG, non-fat milk powder, baking powder, white pepper, and mustard powder. Mix everything together until perfectly combined. This custom blend is key to the Chick-fil-A taste.
Step 4: Prepare the Chicken Breasts
Carefully remove the tenderloin portions from your boneless, skinless chicken breasts. This ensures a more uniform thickness. Then, using a sharp knife, butterfly or slice each chicken breast horizontally into 4-ounce fillets. The goal is to achieve fillets of consistent thickness, which is vital for even brining and frying. Pat the chicken dry lightly with paper towels before brining.
Step 5: Brine the Chicken for Optimal Tenderness and Flavor
Submerge the prepared chicken fillets completely into the brine mixture you made in Step 1. Ensure all pieces are fully covered by the liquid. Cover the bowl or container and refrigerate for a minimum of 6 hours, or ideally, 8 hours. This prolonged brining period is critical; it tenderizes the chicken and infuses it with profound flavor, preventing it from drying out during frying.
Step 6: Dry the Brined Chicken
After the brining period, remove the chicken fillets from the brine. It’s crucial to pat them thoroughly dry on both sides using paper towels. Excess moisture on the surface of the chicken can lead to a soggy crust rather than a crispy one, and can also cause the oil to spatter when frying. A dry surface is essential for proper breading adhesion.
Step 7: Heat the Frying Oil to Perfection
In a large, heavy-bottomed pan or Dutch oven, add a generous amount of peanut oil, ensuring it’s deep enough to fully submerge the chicken fillets. Heat the oil over medium-high heat until it reaches a precise temperature of 325°F (163°C). Use a candy or deep-fry thermometer to monitor the temperature accurately. Maintaining this temperature is vital for evenly cooked, golden-brown chicken without burning the exterior or leaving the interior undercooked.
Step 8: Toast the Brioche Buns
While the oil heats, lightly spread butter on the cut sides of your brioche hamburger buns. Place the buttered buns onto a separate pan or griddle over medium heat and toast them until they are a beautiful golden brown and slightly crispy. This adds flavor, texture, and creates a barrier against potential sogginess from the chicken.
Step 9: Create the Signature Crumbly Coater
Return to your seasoned coater mixture. Drizzle 2 to 3 tablespoons of the milk wash (from Step 2) directly into the flour mixture. Using your hands, gently mix and rub the liquid into the dry ingredients. This unique step creates small clumps and “crumbs” within the flour, which are responsible for the distinctively craggy, crispy texture of the Chick-fil-A breading. Adjust the amount of milk wash to achieve a consistently crumbly texture.
Step 10: Bread the Chicken Fillets
Take one dry chicken fillet and fully dip it into the milk wash, allowing any excess to drip off. Immediately transfer the wet chicken to the prepared seasoned coater. Press the chicken fillet firmly into the coater with your palm, ensuring every part is covered and the breading adheres well. Flatten the chicken slightly as you press, creating an even thickness that will cook uniformly.
Step 11: Fry the Chicken to Golden Crispness
Carefully lower the breaded chicken fillet into the preheated 325°F (163°C) peanut oil. Fry each piece for at least 4 minutes, or until it’s deep golden brown and cooked through. Depending on the thickness of your chicken, it might need an extra minute or two. Ensure the internal temperature reaches 165°F (74°C) for food safety. Do not overcrowd the pan, as this lowers the oil temperature and leads to greasy chicken. Fry in batches if necessary. Once perfectly fried, transfer the chicken to a wire rack set over a baking sheet to drain any excess oil and allow it to cool for a couple of minutes. This resting period helps redistribute juices and keeps the crust crispy.
Step 12: Assemble and Serve Your Masterpiece
On the bottom half of a toasted brioche bun, arrange two crisp dill pickle slices. Place the freshly fried, perfectly crispy chicken fillet on top of the pickles. Crown it with the other half of the toasted bun. Serve your homemade Chick-fil-A Chicken Sandwich immediately and savor the incredible flavors and textures you’ve created from scratch!
Tips for Achieving Copycat Perfection
To truly nail this Chick-fil-A copycat, consider these expert tips:
- Temperature Control is Key: Invest in a reliable deep-fry thermometer. Fluctuations in oil temperature can lead to greasy or unevenly cooked chicken. Maintain 325°F (163°C) for consistent results.
- Don’t Skimp on Brining: The 6-8 hour brine is non-negotiable. It’s what makes the chicken incredibly tender and moist. Plan ahead for this step.
- Pat Dry Thoroughly: After brining, ensure your chicken is bone-dry before breading. Moisture is the enemy of crispiness.
- Work in Batches: Avoid overcrowding your frying pan. Frying too many pieces at once will drop the oil temperature and result in less crispy chicken.
- The Crumbly Coater: Don’t skip adding the milk wash to the flour. Those small clumps are what give the breading its characteristic texture. Use your hands to really work it in.
- Quality Ingredients Matter: While generic brands often work, for a truly authentic taste, opt for quality chicken breasts, fresh brioche buns, and good dill pickles.
- Serve Immediately: This sandwich is best enjoyed hot and fresh, when the chicken is at its crispiest and the bun is still warm.
Elevate Your Homemade Chick-fil-A Experience
While the classic preparation is undeniably delicious, there are ways to personalize and enhance your homemade Chick-fil-A sandwich:
- Sauce It Up: No Chick-fil-A experience is complete without its signature sauce. Consider whipping up a copycat Chick-fil-A sauce, spicy mayo, or honey mustard to accompany your sandwich.
- Add Fresh Toppings: A crisp leaf of lettuce or a slice of ripe tomato can add a refreshing element, though purists might stick to the original simple setup.
- Cheese Please: For cheese lovers, a slice of American or sharp cheddar cheese melted onto the hot chicken right after frying can be a delightful addition.
- Pair with Sides: Complete your meal with classic fast-food sides. Homemade waffle fries, a fresh coleslaw, or a fruit cup would perfectly complement your sandwich.
Accessible Ingredients: Your Chick-fil-A Sandwich, Anywhere
One of the great aspects of this recipe is the accessibility of its ingredients. Whether you’re shopping at a large retailer like Walmart, a local specialty grocery store, or a farmers’ market, you’ll find everything you need to recreate this culinary delight. The beauty of a homemade copycat is that you have full control over the quality and sourcing of your components, allowing you to tailor it to your preferences and budget while still achieving that iconic taste.
Conclusion: The Ultimate Homemade Fast-Food Classic
Recreating the Chick-fil-A Chicken Sandwich at home is more than just cooking; it’s a journey into the art of flavor replication and meticulous technique. By following Jason Farmer’s insightful recipe and paying close attention to the brining, breading, and frying processes, you can achieve a sandwich that is incredibly moist, perfectly crispy, and bursting with the familiar flavors you crave. This isn’t just a meal; it’s a testament to the joy of homemade goodness. So, gather your ingredients, clear your schedule for that essential brining time, and prepare to indulge in the best homemade chicken sandwich you’ll ever make. Enjoy every single bite!