
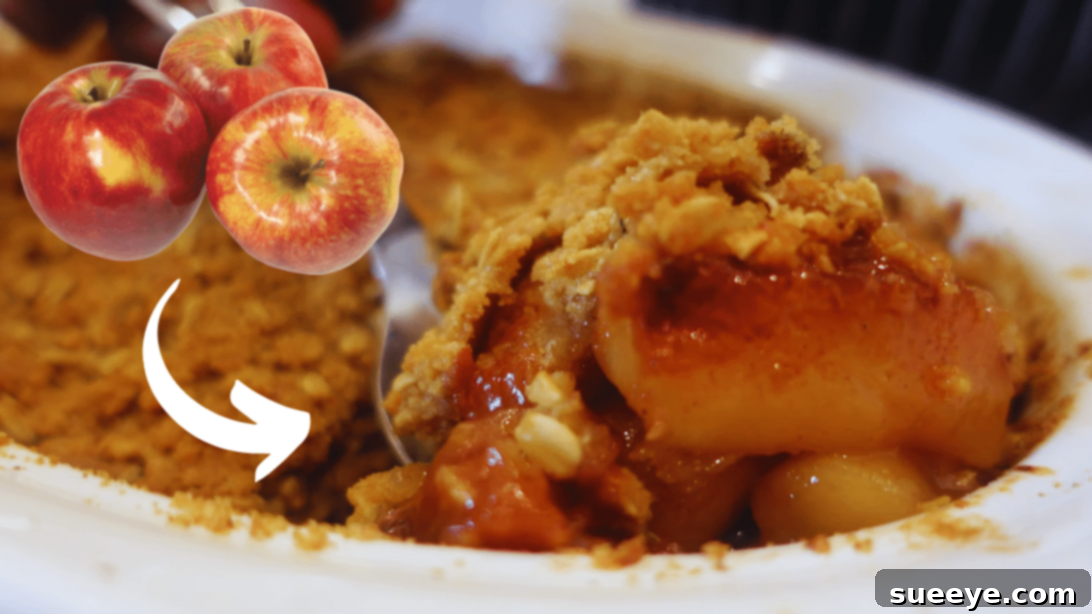
The Ultimate Apple Crisp Recipe: A Thanksgiving Delight
As the air turns crisp and leaves begin to fall, the Thanksgiving season brings with it a desire for warmth, comfort, and delicious food. While the main course often takes center stage, no festive meal is truly complete without a show-stopping dessert. With countless options available, choosing the perfect sweet ending can be a delightful challenge. If you’re seeking a dessert that embodies tradition, simplicity, and guaranteed satisfaction for all ages, look no further than the timeless classic: Apple Crisp.
This beloved dessert, with its tender, spiced apple filling crowned by a buttery, oat-filled crumble, offers a comforting embrace that perfectly complements any holiday feast. It’s a treat that evokes nostalgia, tastes incredibly fresh, and is surprisingly straightforward to prepare. We’re thrilled to share an exceptional apple crisp recipe from Flavor Per Bite on YouTube, designed to impress every guest, from the youngest family member to the most discerning palate.
Why Apple Crisp is the Perfect Dessert for Any Occasion
Apple crisp stands out as a quintessential fall and holiday dessert for several compelling reasons. Its origins can be traced back to the early 20th century, emerging as a simpler, often crust-less alternative to traditional apple pie. This makes it less intimidating for novice bakers while still delivering all the beloved flavors of baked apples. It’s also incredibly versatile – equally at home at a casual family dinner as it is gracing the table of a grand Thanksgiving celebration.
Beyond its historical charm, the appeal of apple crisp lies in its contrasting textures and harmonious flavors. The juicy, slightly tart apples become incredibly tender as they bake, infused with warm spices. This is perfectly complemented by the rich, crunchy crumble topping, offering a delightful textural play in every spoonful. Unlike some more elaborate desserts, an apple crisp doesn’t demand complicated techniques or a long list of exotic ingredients. It champions simple, wholesome components, transforming them into something truly extraordinary.
RELATED RECIPE IDEA: If you enjoy fruit-based desserts, you might also love this Easy Peach Crisp Recipe for a different seasonal delight.
Essential Ingredients for the Perfect Apple Crisp
Creating an unforgettable apple crisp starts with selecting the right ingredients. Each component plays a vital role in achieving that perfect balance of sweetness, spice, and texture. Here’s what you’ll need for this superb recipe:
- Apples: The star of the show! A mix of sweet and tart apples (like Granny Smith, Honeycrisp, Fuji, or Gala) is often recommended for complex flavor and texture.
- Orange: Both the zest and juice add a bright, fragrant lift that enhances the apple flavor and prevents the dessert from being overly sweet.
- Lemon: Similar to orange, lemon zest and juice provide essential acidity to balance the sweetness and bring out the natural apple notes.
- Granulated Sugar: Sweetens the apple filling.
- Cinnamon: The quintessential apple spice, offering warmth and aromatic depth.
- Nutmeg: A subtle hint of nutmeg complements cinnamon beautifully, adding another layer of cozy flavor.
- All-Purpose Flour: Forms the base of our irresistible crumble topping.
- Brown Sugar: Adds a rich, molasses-like sweetness and moisture to the crumble, contributing to its signature texture.
- Rolled Oats (Old-Fashioned): Essential for that rustic, chewy texture in the crumble. Avoid instant oats, as they can become mushy.
- Cold Butter: Crucial for a truly crumbly topping. Cold butter, cut into pieces, ensures that the crumble maintains its structure and doesn’t melt too quickly, resulting in a delightfully crisp texture.
Step-by-Step Guide: How to Make the Best Apple Crisp
Follow these detailed instructions to create a mouthwatering apple crisp that will become a staple in your dessert repertoire. This recipe is designed to be straightforward, ensuring a perfect result even for those new to baking.
Step 1: Preparing the Flavorful Apple Filling
The foundation of any great apple crisp is a perfectly prepared apple filling. Begin by selecting your apples; a mix of sweet and tart varieties often yields the most balanced flavor. Carefully peel and core each apple, then slice them into even wedges, about ¼ to ½ inch thick. Consistency in slice size is key to ensuring they cook evenly. Transfer these sliced apples to a large mixing bowl.
Next, it’s time to infuse the apples with vibrant citrus notes and warm spices. Zest an entire orange directly over the apples, then squeeze all of its fresh juice into the bowl. Repeat this process with a lemon, adding both the zest and juice. The citrus not only brightens the flavor but also helps prevent the apples from browning too quickly. Give the apples a thorough toss to ensure every slice is coated. Now, sprinkle in the granulated sugar and a couple of teaspoons of ground cinnamon. Use a fine grater to grate fresh nutmeg directly into the bowl for a potent aroma and flavor boost. Continue to mix everything until the apples are uniformly coated with the sugar, citrus, and spices. Once perfectly combined, set the bowl aside, allowing the flavors to meld while you prepare the topping.
Step 2: Crafting the Irresistible Crumble Topping & Assembling the Dish
The crumble topping is what truly distinguishes an apple crisp. For this, grab a stand mixer bowl (or a large mixing bowl if you prefer to use a pastry blender or your hands). Add the all-purpose flour to the bowl. Turn the mixer to medium speed, then gradually pour in the brown sugar, followed by the rolled oats. Finally, add your cold butter, cut into small slices or cubes. It is crucial that the butter is cold; this prevents it from fully melting too quickly and helps create those desirable pea-sized crumbs that become wonderfully crisp when baked.
Continue mixing until the ingredients are well combined and the mixture resembles coarse crumbs, with the butter pieces about the size of small peas. Avoid overmixing, as this can result in a tougher topping. Once the crumble is ready, set it aside. Prepare your baking dish by greasing it generously with butter. This not only prevents sticking but also contributes to a golden-brown bottom crust. Preheat your oven to a precise 350°F (175°C). Retrieve your greased baking dish and transfer the prepared apple mixture into it, spreading it out evenly to form a consistent layer.
Step 3: Baking to Golden Perfection & Achieving Extra Crispness
With the apple filling evenly distributed, it’s time to add the star topping. Pour the prepared crumble mixture all over the apples, spreading it out until the entire surface is uniformly coated. Ensure there are no large clumps and that the crumble is spread as evenly as possible for consistent baking and crispness. Carefully place the baking dish into your preheated 350°F (175°C) oven.
Allow the apple crisp to bake for approximately 45 minutes. During this time, the apples will soften and become tender, and the crumble topping will turn a beautiful golden brown and become deliciously crisp. You’ll know it’s ready when the apple juices are bubbling up around the edges of the dish and the topping is deeply golden. After 45 minutes, carefully remove the baking dish from the oven. For an extra touch of golden crispness, brush some melted butter lightly over the top of the crumble. Return the dish to the oven for an additional 5 minutes. This final bake will deepen the color and enhance the texture of your topping. Once done, remove it from the oven and let it cool slightly before serving. The aromas filling your kitchen will be absolutely irresistible!
Tips for the Perfect Apple Crisp Every Time
- Choose Your Apples Wisely: A blend of sweet and tart apples (e.g., Granny Smith for tartness, Honeycrisp for sweetness and texture) offers the best flavor complexity.
- Don’t Skip the Citrus: Lemon and orange zest and juice are crucial. They cut through the sweetness, brighten the apple flavor, and prevent oxidation.
- Cold Butter is Key: For the crumble, always use very cold butter. This creates a flakier, crispier topping. You can even cube it and chill it further before mixing.
- Avoid Overmixing the Crumble: Mix just until pea-sized crumbs form. Overmixing can develop the gluten in the flour, leading to a tougher topping.
- Let it Rest: While tempting to dive in immediately, allowing the crisp to cool for 15-20 minutes after baking allows the juices to set, preventing a runny filling.
Variations to Elevate Your Apple Crisp
While this classic apple crisp recipe is divine on its own, don’t hesitate to experiment with additions to customize it to your taste:
- Nuts: Add chopped pecans, walnuts, or almonds to the crumble topping for extra crunch and nutty flavor.
- Dried Fruits: A handful of raisins, dried cranberries, or chopped dried apricots mixed with the apples can add chewiness and a different layer of sweetness.
- Spices: Introduce a pinch of ginger, cardamom, or allspice to the apple filling for a more complex spice profile.
- Topping Variations: For a richer crumble, you can melt a tablespoon of butter and toss it with an extra tablespoon of brown sugar and a pinch more cinnamon before sprinkling over the top for the final 5 minutes of baking.
Serving Suggestions for an Unforgettable Dessert
An apple crisp is a heartwarming dessert that pairs beautifully with a variety of accompaniments. Serve it warm, straight from the oven, with a generous scoop of vanilla bean ice cream that slowly melts into the warm apples. A dollop of freshly whipped cream is another classic choice, offering a light, airy contrast. For an extra indulgent treat, drizzle a touch of homemade caramel sauce or a sprinkle of toasted pecans over the top. It’s also delightful on its own, a perfect comforting snack with a cup of coffee or tea.
Storage Instructions
Leftover apple crisp can be stored covered in the refrigerator for up to 3-4 days. Reheat individual portions in the microwave or a conventional oven until warmed through. The topping may lose some of its crispness in the refrigerator but can be partially restored by reheating in a toaster oven or conventional oven.
This ultimate apple crisp recipe is more than just a dessert; it’s a celebration of fall flavors, family gatherings, and the simple joy of homemade treats. It’s easy enough for a beginner yet impressive enough for a special occasion. We encourage you to try this recipe and make it your own holiday tradition.
*All these images are credited to Flavor Per Bite via YouTube. Give his channel a visit and subscribe for more delightful recipes and cooking tips!