
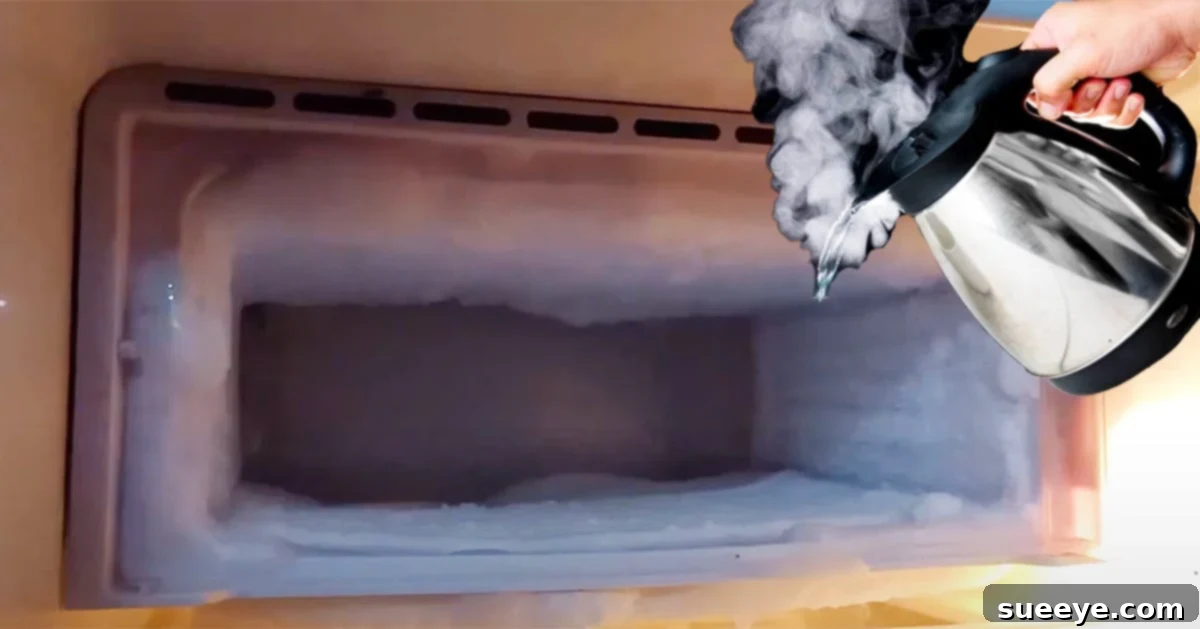
Effortless Freezer Defrost: The Ultimate 1-Minute Hot Water Hack for Removing Stubborn Ice Buildup
Is your freezer beginning to resemble an arctic cave rather than a functional food storage unit? That persistent and often unsightly layer of ice buildup isn’t just an aesthetic inconvenience; it significantly hinders your freezer’s efficiency, increases energy consumption, and can even shorten the lifespan of your appliance. While many traditional defrosting methods demand hours of waiting, messy scraping, or even risk damaging the freezer, there’s a revolutionary cleaning hack that promises to melt away even the most stubborn ice in as little as 60 seconds. Forget the dangerous screwdrivers and hard tools; this ingenious method, popularized by experts like the MD Service Center on YouTube, harnesses the simple power of hot boiling water for a remarkably swift, safe, and effective solution.
Excessive ice accumulation within your freezer can lead to a cascade of problems. It drastically reduces usable storage capacity, forcing your appliance to work considerably harder and consume more electricity to maintain its set temperature. This added strain can also contribute to inconsistent temperatures, potentially compromising food quality and leading to costly spoilage. Furthermore, attempting to chip away at dense ice layers with sharp objects such as knives, chisels, or screwdrivers is highly ill-advised. This practice not only poses a serious risk of personal injury but also a grave threat to your freezer’s delicate internal components, including the potential to puncture refrigerant lines or damage the protective lining. This straightforward hot water technique offers a superior, efficient, and incredibly rapid alternative, ensuring your freezer is restored to its optimal operating condition without any of the traditional hazards or lengthy waiting periods.
Why Does Ice Accumulate in My Freezer? Understanding the Root Causes of Frost Buildup
Before we delve into the quick-fix solution, it’s beneficial to understand the underlying reasons why freezers develop ice buildup in the first place. This prevalent household issue isn’t always indicative of a faulty appliance; more often, it’s a consequence of everyday usage patterns and environmental factors. Several common culprits contribute to the gradual formation of frost and ice:
- Frequent or Prolonged Door Openings: Every time the freezer door is opened, a rush of warm, humid air from your kitchen infiltrates the cold interior. As this moisture-laden air encounters the sub-zero surfaces, it rapidly condenses and freezes, progressively forming layers of ice.
- Compromised Door Seals: A worn, cracked, or improperly sealing door gasket is a primary offender in ice accumulation. If the rubber seal isn’t airtight, warm ambient air can continuously seep into the freezer compartment, leading to persistent and rapid ice formation. It’s crucial to regularly inspect your door seals for any visible signs of damage, gaps, or stiffness.
- Overpacked or Underpacked Freezers: While a moderately full freezer generally operates more efficiently (as frozen food acts as a cold reservoir, helping to maintain stable temperatures), an excessively packed unit can obstruct vital airflow. This leads to uneven cooling and localized hot spots where moisture can more easily condense and freeze. Conversely, an almost empty freezer contains more open air space, providing ample opportunity for moisture to settle and freeze.
- Placing Warm Food Inside: Introducing hot or even warm food directly into the freezer significantly increases the internal temperature and humidity. The freezer must then expend extra energy to cool down the new items, simultaneously elevating the moisture content inside, which accelerates ice formation on nearby surfaces.
- High Ambient Humidity: If you reside in a climate with high humidity, or if your kitchen frequently experiences elevated moisture levels (e.g., from cooking without adequate ventilation), a greater amount of moisture will enter your freezer each time the door is opened, exacerbating the ice problem.
By comprehending these common causes, you gain the power not only to effectively address existing ice problems but also to proactively implement preventative measures. This knowledge will help keep your freezer running smoothly, efficiently, and ice-free for extended periods, ultimately enhancing its performance and longevity.
The Undeniable Benefits of Regular Freezer Defrosting
Defrosting your freezer extends far beyond merely clearing out ice; it constitutes a critical aspect of routine appliance maintenance that offers a multitude of tangible advantages for both your appliance and your household:
- Remarkable Energy Efficiency Improvement: A thick insulating layer of ice forces your freezer’s compressor to work much harder and for longer durations to maintain the desired low temperature. This constant overexertion directly translates to significantly higher electricity bills. A defrosted and clean freezer, free from ice, operates with far greater efficiency, leading to noticeable savings on your utility costs.
- Significantly Extended Appliance Lifespan: When a freezer is perpetually overworked due battling excessive ice buildup, its core components, such as the compressor, condenser coils, and thermostat, endure increased wear and tear. Regular defrosting alleviates this unnecessary strain, thereby contributing substantially to a longer and more reliable operational life for your valuable appliance.
- Maximized Usable Storage Space: It’s simple physics: ice occupies volume! Removing accumulated ice immediately liberates precious storage real estate within your freezer. This extra space allows for better organization of your frozen goods, easier access to items, and eliminates the frustration of trying to squeeze new groceries into an already cramped, icy compartment.
- Enhanced Food Preservation Quality: Excessive ice buildup can sometimes lead to slight but impactful temperature fluctuations within the freezer compartment. These inconsistencies can negatively affect the quality and safety of your food, contributing to issues like freezer burn and diminished taste. A properly defrosted freezer maintains a much more consistent and stable temperature, thereby reducing freezer burn and ensuring your food stays fresh and palatable for longer.
- Elimination of Stale Odors: While not always immediately apparent, persistent ice buildup can sometimes trap and harbor stale or unpleasant odors over time. A thorough defrosting and subsequent cleaning provide an excellent opportunity to eliminate these lingering smells, leaving your freezer smelling fresh and clean.
Essential Supplies You’ll Need for This Quick Defrost Method:
One of the most attractive aspects of this innovative freezer defrosting hack is its minimal requirement for specialized tools or expensive supplies. You will very likely find everything you need already available within your own kitchen or utility closet, making this method not only effective but also incredibly convenient and cost-efficient.
- Hot Boiling Water: This is the absolute cornerstone of our quick defrosting strategy. Ensure the water is genuinely at a rolling boil for maximum heat transfer and effectiveness. You’ll need a sufficient quantity to cover the most stubbornly icy areas, so a standard electric kettle or a medium-sized pot heated on your stovetop will be necessary. Have enough ready to go for multiple applications if required.
- An Abundant Supply of Towels and Rags: Prepare plenty of highly absorbent towels and rags. These are crucial for soaking up the significant volume of melted ice water that will accumulate. For larger freezers or extensive ice buildup, having a small mop or a bucket readily available can be exceptionally helpful for efficient water collection and disposal, especially if your freezer unit lacks a dedicated defrost drain or drip tray.
- A Sturdy Container or Bowl (with a spout is a bonus): This will be useful for carefully pouring hot water over specific, targeted areas with enhanced precision, particularly for ice buildup on shelves or the upper sections of the freezer.
- An Empty Cooler or Insulated Bags: These are absolutely essential for temporarily storing your delicate frozen food items while the defrosting process is actively underway. Ensuring your food remains at safe temperatures during this period is paramount to prevent thawing and potential spoilage.
- Gloves (Optional, but Recommended): While not strictly mandatory, wearing heat-resistant gloves can offer an extra layer of protection for your hands, particularly when handling very hot water or when reaching into the now-cold and damp freezer interior.
Directions: Your Comprehensive Step-by-Step Guide to a Completely Frost-Free Freezer
Please follow these detailed instructions meticulously to guarantee both a safe and highly effective defrosting experience. Prioritizing safety throughout this process is paramount!
Step 1: Meticulous Preparation – Power Down, Unplug, and Empty Your Freezer
This initial stage is, without a doubt, the most critical preliminary step. Before proceeding with any other actions, always prioritize your safety and the safety of your appliance:
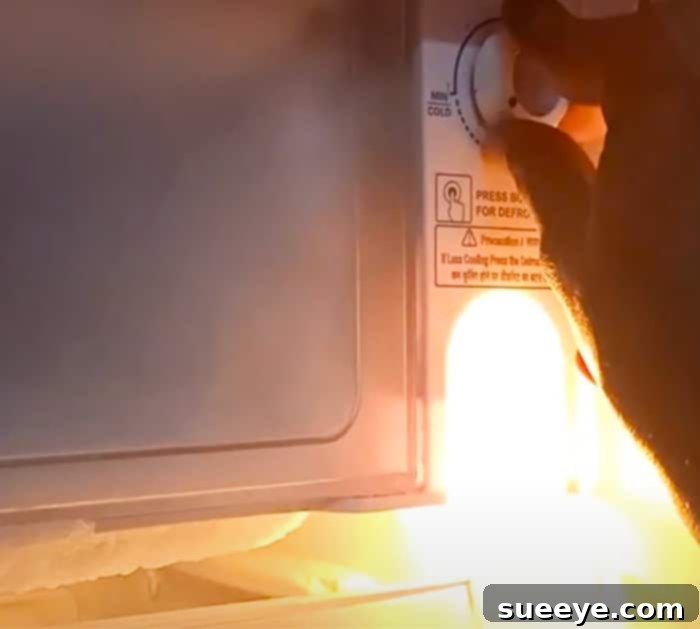
- Switch Off and Immediately Unplug: Begin by locating your freezer’s main power switch and turning it to the “off” position. Crucially, then immediately unplug the appliance’s power cord from the wall outlet. This vital step eliminates any risk of electric shock and allows the defrosting process to commence safely. Never, under any circumstances, pour water or conduct wet cleaning near an electrical appliance that is still connected to a power source.
- Completely Remove All Contents: Carefully take out every single item from your freezer. This includes all frozen food packages, ice cube trays, and any removable shelves, baskets, or drawers.
- Safely Store Frozen Food: Transfer all your frozen food items into an insulated cooler filled generously with ice or ice packs, or utilize specialized insulated bags. The primary objective here is to maintain their frozen state for as long as possible to prevent any thawing. Position this temporary storage in the coolest part of your home while you diligently work on the freezer.
- Prepare the Surrounding Area: If feasible, gently pull the freezer slightly away from the wall. This creates valuable working space and ensures adequate ventilation. Lay down several old towels, newspapers, or even a waterproof tarp around the entire base of the freezer to diligently catch any potential drips, spills, or melted water runoff.
Step 2: The Hot Water Application – Gently and Safely Melting the Ice
This is the pivotal moment where the magic of this hack truly unfolds. While it’s a quick process, a degree of patience (even for just a minute or two!) and precision in your application are incredibly important here.
- ABSOLUTELY DO NOT Use Sharp Objects: We cannot emphasize this warning enough. Under no circumstances should you ever resort to using knives, screwdrivers, ice picks, metal spatulas, or any other sharp, pointed, or hard metallic tools to chip away at or pry off the ice. Such actions can inflict irreversible damage to your freezer’s interior lining, potentially puncturing refrigerant lines, damaging heating elements (in frost-free models), or causing expensive structural harm that could necessitate costly repairs or even the premature replacement of your entire appliance.
- Prepare Your Boiling Water: Bring a full kettle or pot of water to a vigorous boil. Depending on the volume of ice buildup, you might need to prepare several batches of hot water.
- Careful and Targeted Pouring: Gently and steadily pour the hot boiling water directly over the thickest and most stubborn layers of ice. There’s no need to deluge the entire interior; instead, focus your efforts on the areas with the most significant accumulation. The intense heat from the water will rapidly penetrate the ice, causing it to loosen, crack, and melt almost instantly upon contact.
- Alternative Targeted Application Methods: For smaller, particularly resistant patches of ice or for areas that are difficult to reach with a direct pour, you can dip a thick cloth or sponge into the hot water and then carefully press it against the ice, allowing the concentrated heat to transfer directly. Alternatively, a clean spray bottle filled with hot water can offer an even more precise and controlled application for those tricky, confined spaces.
- Observe the Melting Process: You will notice the ice immediately beginning to crack, detach, and melt within mere seconds of applying the hot water. For exceptionally thick or deeply entrenched layers, you might find it necessary to repeat the pouring process a few times, allowing the heat to work its way through the entire mass.
Step 3: Efficient Water Management and Thorough Cleanup
As the ice rapidly melts away, you will inevitably be left with a significant amount of water that must be managed efficiently to prevent spills, mess, and potential damage to your flooring or cabinetry.
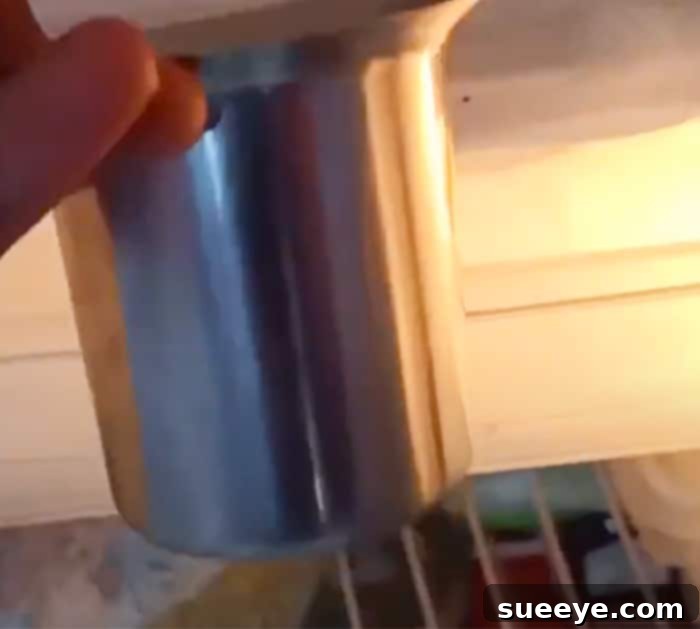
- Collect Melted Water Effectively: Depending on the specific model and design of your freezer, it may be equipped with a dedicated defrost drain and a removable drip tray, typically located beneath the appliance. If your freezer has this feature, periodically remove and carefully empty this tray as it fills with melted water.
- Absorb and Wring Out: If your freezer does not possess a convenient drip tray, or if you are primarily dealing with ice buildup in the upper sections or on internal shelves, make liberal use of your prepared supply of absorbent towels and rags to soak up the melted water. As the cloths become saturated, wring them out thoroughly into a separate bucket or directly into a sink. Repeat this process continuously until all accessible water has been collected.
- Repeat Application and Cleanup if Necessary: Continue the cycle of carefully pouring hot water onto remaining ice patches and diligently soaking up the resulting melted water until every last significant chunk of ice buildup has been completely removed. Be exceptionally thorough in this stage, ensuring that no large or small ice patches are left behind.
- Final Interior Wipe Down and Drying: Once all the ice has vanished and all the melted water has been removed, use a fresh, clean, and completely dry cloth to meticulously wipe down the entire interior surfaces of the freezer. It is absolutely crucial that every surface, including walls, shelves, and the bottom, is bone-dry. Any lingering residual moisture, no matter how minor, can quickly refreeze once the appliance is powered back on, thereby initiating the ice buildup problem all over again.
Step 4: Restock and Restart – Getting Your Freezer Back to Optimal Performance
After successfully completing a thorough cleaning and drying, your freezer is now ready to be safely returned to its important duties of preserving your food. Adhering to these final steps ensures a smooth transition back to full operation.
- Reinstall Shelves and Drawers: Carefully place back any removable components, such as shelves, baskets, or drawers, that you took out during the initial preparation stage. Ensure they are correctly positioned and secured.
- Plug In and Power On: Reconnect your freezer’s power cord firmly back into the wall outlet. Then, locate and turn on its main power switch.
- Allow Ample Time to Cool Down: It is crucial to allow your freezer sufficient time to cool down significantly and reach its pre-set operating temperature (typically 0°F / -18°C) before you begin returning any food items. This usually takes between 30 to 60 minutes, or potentially longer depending on the model and external conditions. This waiting period prevents the introduction of warm food from forcing the appliance to immediately overwork itself.
- Return Frozen Food Items: Once the freezer has confirmed its cold temperature, carefully transfer all your pre-stored frozen food items back into it. Take this opportunity to organize them efficiently, ensuring there’s adequate space for cold air to circulate freely around all packages.
Preventing Future Ice Buildup: Sustainable Long-Term Solutions
While this hot water defrosting hack is undeniably effective for quick ice removal, adopting proactive prevention strategies is always superior to constantly needing a cure. By incorporating a few straightforward habits into your routine, you can significantly reduce the frequency and severity of ice accumulation in your freezer, thereby minimizing the need for future defrosting sessions:
- Regularly Inspect and Clean Door Seals: Make it a habit to perform a simple “paper test”: close the freezer door on a crisp piece of paper. If you can easily pull the paper out without resistance, your door seal might be compromised. Clean door gaskets periodically with warm, soapy water to remove debris that can prevent a tight seal, and replace them promptly if they appear cracked, stiff, or brittle.
- Optimize Freezer Loading: Aim for a freezer that is reasonably full but not so densely packed that it obstructs essential air vents or prevents the door from forming a complete seal. Leave some strategic space for cold air to circulate freely around all your frozen goods.
- Cool Food Completely Before Freezing: This is a critical step. Always allow hot or even warm food to cool down completely to room temperature before placing it into the freezer. This simple action dramatically minimizes the introduction of warm, moist air into the freezer compartment, which is a primary catalyst for ice formation.
- Minimize Door Opening Frequency and Duration: Train yourself and your household members to retrieve all necessary items from the freezer in a single trip whenever possible. Close the door quickly and ensure it seals firmly each time to limit the influx of humid ambient air.
- Ensure Proper Appliance Leveling: Verify that your freezer is perfectly level. An appliance that isn’t properly balanced can inadvertently affect how the door seals, potentially leading to small but consistent air leaks and subsequent ice buildup.
- Maintain the Correct Temperature Setting: Most freezers operate optimally and efficiently at a temperature of 0°F (-18°C). Consult your appliance’s owner’s manual for specific recommended settings. Setting the temperature too cold might not be necessary for food safety and, in some cases, can paradoxically contribute to excess frost development.
- Implement Regular Mini-Defrosts: If you begin to notice small, localized patches of ice starting to form, address them proactively with a quick hot water wipe-down before they escalate into a much larger, more time-consuming problem. Early intervention can save you significant effort.
Conclusion: A Sparkling, Efficient Freezer in Mere Minutes!
You can now confidently bid farewell to the days of lengthy, arduous defrosting sessions and the ever-present risk of inadvertently damaging your valuable kitchen appliance. This extraordinary hot water hack offers an unparalleled combination of speed, safety, and remarkable effectiveness for removing even the most stubborn ice buildup from your freezer in just minutes. By gaining a clear understanding of the common causes of ice accumulation, skillfully applying this straightforward yet powerful method, and diligently implementing smart preventative measures, you can ensure your freezer consistently operates at its peak efficiency. This optimized performance will not only save you considerable money on your monthly energy bills but also provide the ideal storage conditions to keep your precious frozen food items perfectly preserved.
Integrate this quick defrost method into your regular appliance maintenance routine, and relish the continuous benefits of a sparkling clean, fully optimized, and perpetually ice-free freezer throughout the entire year. Your perfectly preserved frozen goods, along with your significantly reduced energy bills, will undoubtedly express their gratitude!