
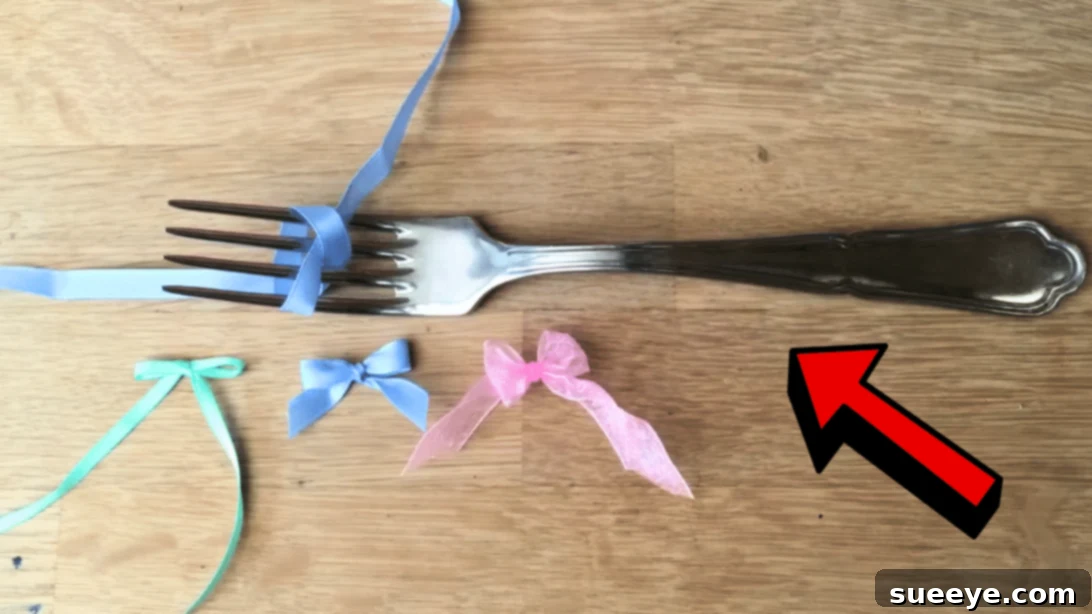
Transform your gift wrapping, craft projects, and handmade creations with the simplest, most ingenious trick for tying perfect bows every time. If you’ve ever struggled with uneven loops, lopsided knots, or ribbons that just won’t cooperate, you’re not alone. Tying a beautiful bow by hand can be surprisingly challenging, especially when aiming for consistent perfection on smaller gifts or delicate embellishments. But what if we told you there’s a revolutionary, almost magical method that guarantees a flawless mini bow with minimal effort? Forget complex techniques and hours of practice; all you need is a common kitchen utensil – a fork!
This brilliant hack, popularized by creative crafters like Red Ted Art (Maggy Woodley) on YouTube, is an absolute game-changer. It demystifies the art of bow making, turning it into a quick, enjoyable, and foolproof process. Whether you’re a seasoned DIY enthusiast or a complete beginner, this technique will elevate your crafting game, allowing you to produce an endless supply of perfectly symmetrical bows for any occasion. Imagine adorning handmade cards, beautifully wrapped presents, or even hair accessories with charming, professional-looking bows that took mere seconds to create. This guide will walk you through every step, ensuring you master this clever trick and unleash a world of crafting possibilities.
RELATED: Master the Art of Tying a Perfect Bow Effortlessly
Once you discover the ease and precision of this fork bow-making method, you’ll wonder how you ever managed without it. It’s truly the only way I prefer to craft small, intricate bows, and I’m confident it will become your go-to technique as well. This tutorial provides comprehensive instructions, accompanied by visuals, to help you understand and execute each step with confidence. Let’s gather our simple materials and embark on a journey to create stunning bows with astonishing simplicity. You might also want to keep the video tutorial handy for a visual demonstration of the technique in action.
Essential Materials for Your Fork Bow-Making Hack
The beauty of this bow-making hack lies in its incredible simplicity and the minimal materials required. You likely already have everything you need lying around your home, making this an accessible and budget-friendly craft. To get started, you will need:
- Ribbon: The star of your bow! Choose any type of ribbon you desire, from satin to grosgrain, organza to wired ribbon. The key is to select a width that is appropriate for the size of bow you wish to create. For small, delicate bows, thinner ribbons (1/8 inch to 1/2 inch) work best with a standard fork. Experiment with different colors and patterns to match your project or occasion.
- Fork: A standard dining fork is perfect. The prongs provide the ideal structure and spacing to guide your ribbon and create uniform loops. Any metal or sturdy plastic fork with four prongs will suffice. Avoid forks with unusually wide or narrow spacing between the prongs, as this might affect the bow’s dimensions.
- Scissors: A sharp pair of scissors is crucial for clean cuts, ensuring crisp ribbon ends and a professional finish for your bows. Dull scissors can fray your ribbon, making it harder to work with and compromising the aesthetic of your final product.
That’s it! With these three simple items, you’re ready to unlock the secret to effortlessly perfect bows.
Mastering the Art: How to Make a Bow Using a Fork
Now that you have your materials ready, let’s dive into the step-by-step process of crafting your elegant bows. This method is incredibly intuitive, and with a little practice, you’ll be creating beautiful bows in a matter of seconds.
Step 1: Preparing Your Ribbon and Initial Loop
Begin by cutting a suitable length of ribbon. The exact length will depend on the desired size of your finished bow and the width of your ribbon, but it’s always better to start with a slightly longer piece than you think you’ll need; you can always trim the excess later. Take one end of your ribbon and carefully loop it around the central two prongs of your fork. As you wrap, ensure the ribbon forms a distinct “V” shape at the front of the fork, as demonstrated in the original video tutorial. This initial V-shape is crucial for establishing the foundation of your bow. Next, take the ribbon tail that is underneath this initial loop and bring it up and over, threading it into the middle slot between the two central prongs. This action effectively secures the ribbon to the fork and creates the first part of your bow’s structure. Hold this in place gently with your thumb or finger to prevent it from slipping as you proceed.
Step 2: Forming the Knot and Securing the Bow
With the first ribbon tail now threaded through the middle slot, take the other ribbon tail (the one that’s currently on top) and bring it under the fork, then up and over the top, pushing it through the same middle slot from the opposite direction. You should now have both ribbon tails emerging from the middle slot, crossing each other. This is where the magic happens! Carefully bring these two ribbon tails together at the front of the fork, directly over the initial V-shape. Cross them over each other and tie them securely in a neat, tight knot at the very center. The key here is to pull firmly but gently to ensure the knot is snug without distorting the ribbon loops that are forming on the fork. A tight knot is essential for a well-defined and long-lasting bow.
Step 3: Releasing Your Perfect Bow and Finishing Touches
Once your knot is firmly tied, the hardest part is over! Now, with utmost care, gently slide the ribbon loops off the prongs of the fork. You’ll be amazed to see a beautifully formed, perfectly symmetrical bow emerge. Handle it gently to avoid undoing the knot or squishing the loops. After removing the bow, take your sharp scissors and trim off any excess ribbon from the tails. You can cut them straight, at an angle, or create a swallowtail V-cut for a more decorative finish. Fluff the loops gently with your fingers to give your bow a full and appealing shape. And just like that, you’re done! You now possess a flawless mini bow, ready to adorn your next project. The beauty of this technique is its repeatability; you can now make many more ribbons with consistent results.
This simple, three-step process makes bow-making accessible to everyone, ensuring beautiful results every single time. Practice makes perfect, but with the fork method, perfection comes remarkably quickly!
Tips for Creating Exquisite Fork Bows
While the fork method is wonderfully straightforward, a few expert tips can help you achieve even more refined and durable bows:
- Ribbon Quality Matters: While any ribbon can work, a good quality ribbon (like satin, grosgrain, or even wired ribbon) will hold its shape better and provide a more luxurious finish. Avoid ribbons that fray excessively or are too flimsy.
- Maintain Consistent Tension: Throughout the wrapping and knot-tying process, try to maintain consistent, gentle tension on the ribbon. This helps create even loops and a tight knot, preventing your bow from becoming loose or lopsided.
- Experiment with Fork Sizes: While a standard fork is ideal for small bows, you might try forks with wider or narrower prongs (if you happen to have them) to create slightly different bow sizes. For larger bows, you would need a different technique, but for delicate accents, the standard fork is king.
- Pre-Cut Ribbons: If you’re making multiple bows for a project, pre-cutting your ribbon lengths can save time and ensure uniformity.
- Practice Makes Perfect: Like any craft, a little practice will make you faster and more confident. After just a few tries, you’ll be making bows almost instinctively.
Unleash Your Creativity: Uses for Your Handmade Fork Bows
Once you’ve mastered this ingenious technique, a world of creative possibilities opens up. These small, perfect bows are incredibly versatile and can be used to add a touch of charm and elegance to countless projects:
- Gift Wrapping: Elevate your gift presentation by adding a handmade bow. It shows extra thought and effort, making any present feel more special.
- Card Making and Scrapbooking: Adorn handmade cards, invitations, or scrapbook layouts with tiny, intricate bows for a delicate and personal touch.
- Hair Accessories: Attach these bows to hair clips, headbands, or elastic ties to create adorable custom hair accessories for children and adults alike.
- DIY Decorations: Use them as embellishments for small ornaments, garlands, party favors, or even miniature wreaths.
- Sewing and Apparel: Attach them to handmade clothing, baby items, or even pet accessories for a cute decorative element.
- Home Decor Accents: Add bows to small vases, picture frames, or candles to tie your home decor together.
- Jewelry Making: Tiny bows can be incorporated into charm bracelets or necklaces for a unique, handmade touch.
The beauty of these bows lies not only in their perfection but also in their ability to add a personal, thoughtful touch to anything they adorn. They are a testament to the fact that even the smallest details can make a huge impact.
Why Embrace This Bow-Making Hack?
Beyond the sheer satisfaction of creating something beautiful with your own hands, the fork bow-making hack offers several compelling advantages:
- Consistency: Achieving perfectly symmetrical bows manually is challenging. The fork acts as a template, ensuring each bow has identical loops.
- Speed: Once you get the hang of it, you can churn out bows in mere seconds, making it ideal for projects requiring multiple embellishments.
- Ease for All Skill Levels: This method bypasses the dexterity often required for traditional bow tying, making it accessible even for children or those with limited fine motor skills.
- Cost-Effective: You’re utilizing readily available materials, making this a very economical way to produce decorative bows compared to purchasing pre-made ones.
- Customization: You have complete control over ribbon choice, color, texture, and the length of the tails, allowing for endless customization to suit any project.
*All these amazing images are thanks to Red Ted Art (Maggy Woodley) via YouTube. Do visit her channel to see more incredibly clever and inspiring videos like this one!
Unlock the Secret to Perfect Bows with a Fork Today!
In conclusion, the simple kitchen fork is not just for eating; it’s a powerful crafting tool that can revolutionize your bow-making experience. This ingenious hack transforms a potentially frustrating task into an enjoyable and incredibly rewarding one. With just a piece of ribbon, a fork, and a pair of scissors, you can consistently create charming, perfectly formed bows that add a touch of elegance and personality to any gift, craft, or decoration.
Whether you’re preparing for a special occasion, embarking on a new DIY project, or simply want to add a handmade flourish to your everyday items, this fork method is your ultimate secret weapon. Say goodbye to lopsided bows and hello to flawless consistency! We encourage you to try this technique today and discover the immense satisfaction of crafting beautiful, intricate bows with such surprising ease. Happy crafting!