
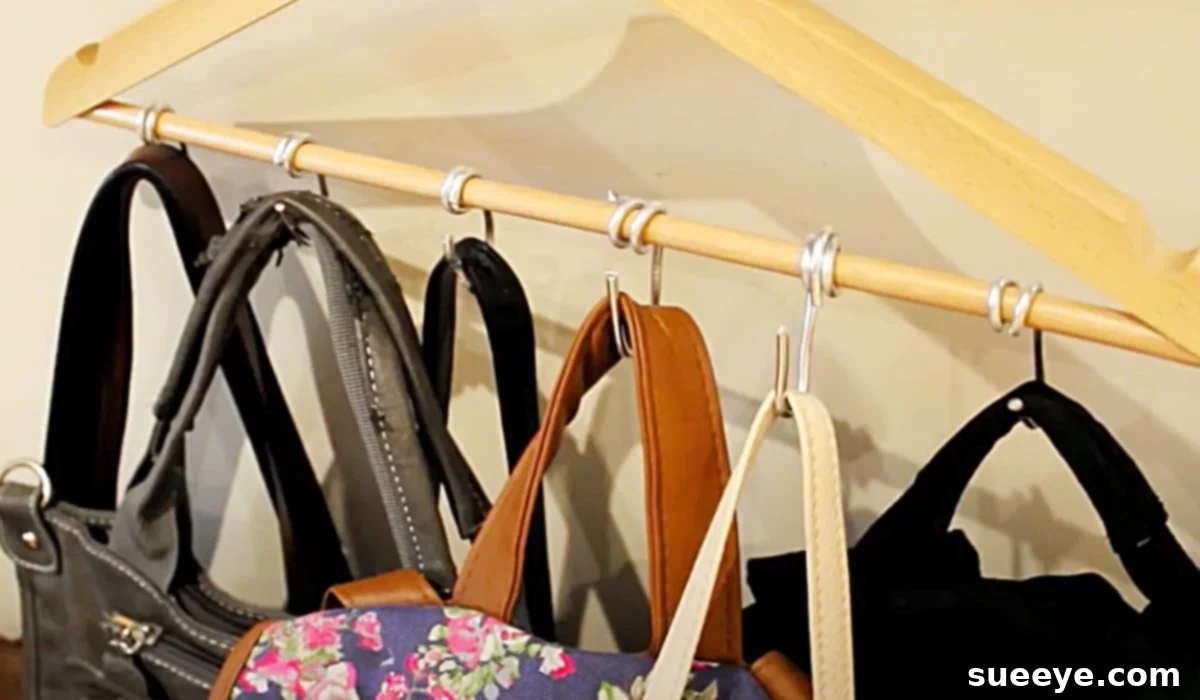
For many fashion enthusiasts, a diverse collection of purses and handbags is an absolute must-have, offering endless possibilities to complement any outfit or occasion. However, the joy of owning multiple stylish bags often comes with a significant challenge: finding effective and space-saving ways to store them. Cluttered closets, tangled straps, and damaged designer bags are common frustrations that lead many to search for smart organization solutions. That’s where creative DIY projects come into play, offering practical and affordable answers to everyday storage dilemmas.
We’ve discovered an incredibly clever and simple DIY purse holder idea that transforms a humble coat hanger into an efficient storage system. Inspired by a fantastic tutorial from Lulia Lup on YouTube, this project promises to revolutionize the way you organize your handbags. What makes this DIY hack particularly appealing is its accessibility; it requires minimal materials, most of which you likely already have around your house, and can be completed in just a few easy steps. Say goodbye to piles of purses taking up precious shelf space and hello to an organized, accessible, and elegant display for your cherished collection.
How To Make A Purse Holder From A Coat Hanger: The Ultimate DIY Storage Hack
The quest for an organized closet is a never-ending journey for many, especially when it comes to accessories like purses. They come in various shapes and sizes, from delicate clutches to large totes, each demanding its own special storage consideration to maintain its form and prevent damage. Traditional storage methods often involve stacking them on shelves, hanging them on hooks where they can get squashed, or stuffing them into drawers, leading to a disorganized mess that makes finding the right bag a frustrating chore. This DIY purse holder offers a brilliant vertical storage solution, utilizing the often-underestimated space within your closet.
This ingenious idea focuses on repurposing a standard coat hanger and a piece of wire to create a custom organizer. By bending the wire into a series of hooks along the lower bar of the hanger, you can create a sturdy and compact display for multiple bags. This method not only keeps your purses visible and easily accessible but also prevents them from getting squashed or losing their shape, extending their lifespan and preserving their aesthetic appeal. It’s a prime example of how creativity and simple materials can solve complex organizational problems without breaking the bank.
Essential Materials For Your DIY Coat Hanger Purse Holder:
One of the greatest advantages of this DIY project is its minimal material requirement. You don’t need to visit a specialty craft store; most of these items are likely already within your reach, making this an incredibly budget-friendly endeavor. Here’s what you’ll need to get started:
- A sturdy coat hanger: A metal or solid wooden hanger works best for stability and durability, especially when holding multiple bags. Plastic hangers can work for lighter purses but may bend under heavier loads.
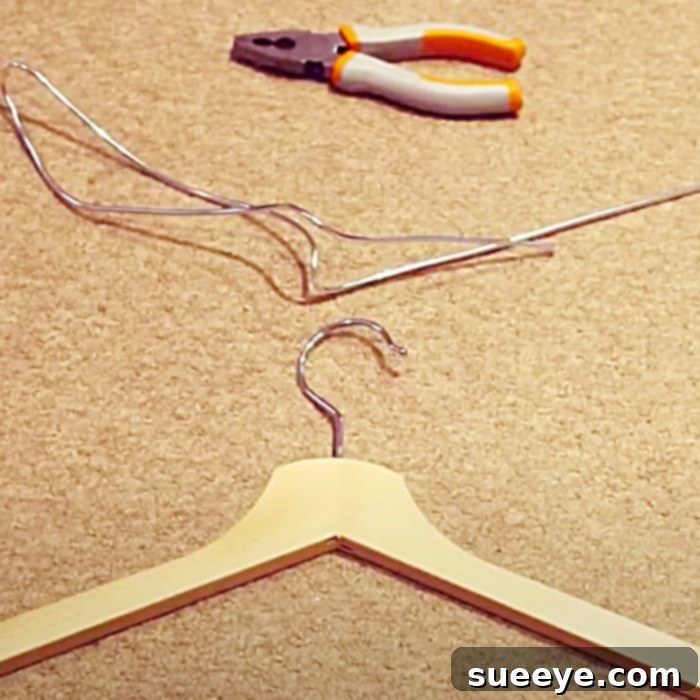
- A piece of strong, pliable wire: Craft wire, galvanized wire, or even electrical wire (with insulation removed) can work. The key is that it’s strong enough to hold shape but pliable enough to bend with pliers. A gauge between 14 and 18 is typically ideal.
- Wire cutters: Essential for precisely cutting your wire to the desired length.
- A pair of pliers: Needle-nose pliers or round-nose pliers are perfect for bending and shaping the wire into neat, secure hooks.
Gathering these simple tools and materials is the first step towards transforming your cluttered closet into an organized haven. The affordability and accessibility of these items mean you can create several of these purse holders for different sections of your wardrobe, or even for other accessories like scarves and belts.
Step-by-Step Directions to Craft Your Own Purse Holder:
The beauty of this DIY project lies in its straightforward execution. Even if you’re new to DIY, you’ll find these steps easy to follow, leading you to a satisfying and functional outcome. We’ll be expanding on the core concept shared by Lulia Lup on YouTube, providing more detailed instructions for a flawless finish.
Before you begin, ensure you have a clear workspace and all your materials readily accessible. Safety is paramount, especially when working with wire cutters and pliers, so always handle your tools with care.
Step 1: Preparing Your Wire for Hook Creation
Start by determining the length of wire you’ll need. A good rule of thumb is to estimate the total width of your coat hanger’s lower bar and then multiply that by a factor of 1.5 to 2, depending on how many hooks you plan to create and how much wire you’ll use for wrapping each hook. For an average hanger, a piece of wire between 2 to 3 feet (approximately 60-90 cm) should be sufficient. Use your wire cutters to snip the wire cleanly. If your wire is coiled, gently straighten it out as much as possible to make it easier to work with.
Step 2: Securing the Initial Wire End to the Hanger
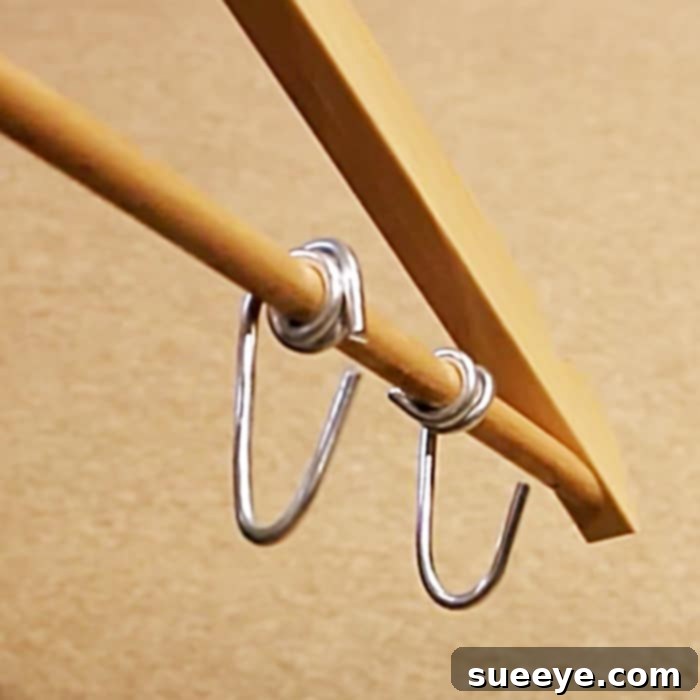
Take one end of your cut wire and begin to wrap it tightly around one side of the coat hanger’s lower bar, near the shoulder of the hanger. Use your pliers to ensure a snug and secure wrap. You’ll want to wrap it around at least 3-4 times to create a firm anchor point. This initial wrap is crucial for the overall stability of your purse holder, so take your time to make it tight and neat. Trim any excess wire at the very end of the wrap to prevent sharp edges.
Step 3: Forming Your First Purse Hook
Now, we’ll create the first hook. About 2-3 inches (5-7 cm) from where you secured the wire to the hanger, use your pliers to bend the wire upwards, then create a loop, and finally bend it back down to form an open hook shape. The size of the loop should be generous enough to easily accommodate the handle of your purses without being too wide. Aim for a hook that is sturdy and slightly curved upwards at the tip to prevent bags from slipping off. Ensure the hook opening faces slightly outward or downwards, making it easy to hang and retrieve your bags.
Step 4: Creating Subsequent Hooks Along the Hanger
Once your first hook is formed, continue along the length of the coat hanger’s lower bar, repeating the process of creating hooks. Space your hooks evenly, typically 2-4 inches (5-10 cm) apart, depending on the size of your purses and the overall length of your wire. For larger bags, you might want more space between hooks. For clutches or smaller bags, you can place them closer together. As you create each hook, ensure the wire connecting it to the hanger is taut and flat against the bar. Use your pliers to gently press the wire against the hanger for a neater appearance and added stability.
Step 5: Securing the Final Wire End
When you’ve created all the desired hooks and reached the other end of the coat hanger’s lower bar, just like in the video tutorial by Lulia Lup, secure the remaining wire in the same manner as you did in Step 2. Wrap the end of the wire tightly around the hanger’s bar 3-4 times, using your pliers to cinch it firmly. Make sure there are no loose ends or sharp points that could snag your purses or scratch your hands. If necessary, use a piece of electrical tape or a small dab of hot glue to cover any sharp wire ends for extra safety and a polished look.
Step 6: Final Touches and Hanging Your New Organizer
Once all your hooks are formed and both ends of the wire are securely fastened, give your new purse holder a quick inspection. Check that all hooks are stable, evenly spaced, and free from any sharp edges. Gently test the strength of the hooks by lightly pulling on them. Your DIY coat hanger purse holder is now ready to be put to use! Hang it inside your closet, on the back of a door, or even on a decorative hook in your dressing area. Begin hanging your purses by their handles, distributing the weight as evenly as possible for optimal balance and longevity.
Tips for Maximizing Your DIY Purse Holder:
- Choose the Right Hanger: For heavy leather bags, opt for a strong wooden or metal hanger. Plastic hangers are better suited for lighter clutches or fabric bags.
- Wire Gauge Matters: A thicker gauge wire (e.g., 14-gauge) will be sturdier but harder to bend. A thinner gauge (e.g., 18-gauge) is easier to work with but might not hold very heavy bags as well. Find a balance that suits your needs.
- Customize Hook Spacing: Tailor the space between hooks to the typical size of your handbags. If you have many large bags, create fewer, wider-spaced hooks. For smaller bags, you can fit more hooks.
- Protect Delicate Handles: If you have purses with very delicate handles, you might consider adding a small piece of felt or fabric around the wire hooks to prevent any friction or indentation.
- Multi-Purpose Organizer: This simple design isn’t just for purses! Use it to organize scarves, belts, ties, or even necklaces.
This is truly such an easy and rewarding way to organize your purses. The materials required are incredibly simple and probably items you already have around the house, making it a sustainable and cost-effective solution. No more rummaging through cluttered shelves or digging through overflowing drawers – with this DIY coat hanger purse holder, every bag will have its designated spot, visible and ready for your next outing.
Why Choose DIY Over Store-Bought Organizers?
While the market is flooded with various purse organizers, this DIY solution stands out for several compelling reasons:
- Cost-Efficiency: Commercial organizers, especially those designed for multiple bags, can be surprisingly expensive. This DIY option leverages materials you might otherwise discard or that are very inexpensive to purchase, saving you money.
- Customization: Store-bought organizers come in fixed sizes and designs. With DIY, you have complete control. You can adjust the number of hooks, their spacing, and even the type of hanger to perfectly suit your specific collection and closet dimensions.
- Sustainability and Repurposing: By reusing an old coat hanger and a piece of wire, you’re engaging in a form of upcycling. This reduces waste and gives new life to items that might otherwise end up in a landfill.
- Personal Satisfaction: There’s a unique sense of accomplishment in creating something functional and beautiful with your own hands. This project is simple enough for anyone to tackle, offering an immediate and tangible reward.
- Space Optimization: Many store-bought solutions are bulky. This slim design maximizes vertical space, allowing you to hang more bags in a smaller footprint compared to laying them flat on shelves.
Embracing DIY projects like this not only helps you create a more organized living space but also fosters a sense of resourcefulness and creativity. It’s a small change that can make a big difference in the daily routine of getting ready, ensuring your favorite accessories are always within reach and in pristine condition.
So, why wait? Grab those few simple materials and dedicate a little time to transforming your purse storage woes into a system of elegant organization. You’ll be amazed at how such a small effort can lead to such a significant improvement in your closet’s functionality and aesthetic appeal. Happy organizing!