
Crafting Your Own Rustic Wagon Wheel Chandelier: A Timeless DIY Lighting Project
There’s an undeniable allure to the past, a magic imbued in objects that once served a vital purpose. Among these, the humble carriage or wagon wheel stands out, carrying with it echoes of bygone eras, frontier spirit, and simpler times. While we may no longer traverse dusty roads in horse-drawn carriages, these magnificent wheels continue to inspire, finding new life in contemporary design. Far from being relegated to historical artifacts, they are now cherished for their rustic beauty and incredible potential for repurposing, particularly in creating breathtaking, unique lighting fixtures.
The concept of transforming an old wagon wheel into a chandelier is not merely a craft project; it’s an art form that marries history with functionality. Imagine the warm glow emanating from a piece that tells a story, a focal point that instantly infuses your home, cabin, or office with unparalleled character. This project offers a truly charming and distinctive lighting solution, perfect for anyone seeking to bring a touch of natural, rustic elegance into their environment.
Embracing the Charm of Repurposed Design
The appeal of a wagon wheel chandelier lies in its authentic rustic aesthetic. It’s a design choice that speaks volumes about appreciation for heritage, craftsmanship, and sustainable living through repurposing. In a world increasingly dominated by mass-produced items, a handcrafted chandelier made from a reclaimed wagon wheel stands as a testament to individuality and creativity. It’s not just a light source; it’s a conversation starter, a piece of decor that captivates and enchants.
This unique lighting idea effortlessly complements a variety of interior design styles. Whether your space leans towards farmhouse chic, industrial rustic, vintage eclectic, or even a cozy cabin retreat, a wagon wheel chandelier integrates seamlessly, adding warmth and a sense of history. Its organic lines and robust materials bring an earthy, grounded feel that modern decor often lacks, creating a perfect balance between old-world charm and contemporary living.
Choosing Your Wagon Wheel: The Foundation of Your Chandelier
The first and arguably most crucial step in embarking on this DIY journey is selecting the right wagon wheel. The availability and condition of wheels can vary greatly, influencing the final look and structural integrity of your chandelier.
Where to Find Them:
- Antique Stores and Salvage Yards: These are treasure troves for authentic, aged wagon wheels. You might find a wheel rich with character, bearing the beautiful patina of time.
- Flea Markets and Estate Sales: Keep an eye out for hidden gems. You might discover a suitable wheel at an unexpected bargain.
- Online Marketplaces: Websites specializing in vintage and reclaimed items often list wagon wheels. Be sure to check descriptions and photos carefully.
- Specialty Rustic Decor Stores: Some stores might carry new, reproduction wagon wheels designed specifically for decorative purposes. While lacking the history of an antique, they can be a great starting point for a clean, consistent look.
What to Look For:
- Size: Consider the scale of your space. A very large wheel might overwhelm a small room, while a tiny one could get lost in a grand entryway. Measure your intended hanging area and choose accordingly.
- Condition: While a rustic look embraces imperfections, ensure the wheel is structurally sound. Check for significant rot, severe cracks, or loose spokes that could compromise safety once heavy bottles and wiring are added. Minor cosmetic flaws can often be addressed or celebrated as part of its charm.
- Material: Most authentic wagon wheels are made of durable hardwood, often with metal rims. Ensure the wood is solid and the metal secure.
- Cleaning and Preparation: Once you’ve acquired your wheel, a thorough cleaning is essential. Remove dirt, debris, and loose paint. You might choose to lightly sand it to smooth rough edges or apply a wood preservative or sealant to protect it for years to come. Some prefer to leave it in its raw, weathered state for maximum authenticity.
Illuminating Your Wheel: Bottle and Jar Selection
The brilliance of this project lies in its customizability, especially when it comes to the light fixtures themselves. The original article highlights the use of Jack Daniels bottles, a popular choice that many DIY enthusiasts on platforms like Pinterest embrace for their distinctive square shape and amber hue. However, your options are truly limitless, allowing you to personalize your chandelier to perfectly match your aesthetic preferences.
Popular Choices:
- Jack Daniels Bottles: Their iconic design adds a touch of industrial cool and often a warm, golden glow to the light.
- Mason Jars: A classic for rustic and farmhouse decor, mason jars offer a clean, versatile look. They come in various sizes and even some lovely antique blue or green tints, which can diffuse light beautifully.
- Wine Bottles: Elegant and diverse, wine bottles can be cut to create unique shades or used whole with small lights inserted. Consider clear, green, or amber varieties.
- Other Liquor Bottles: Explore different shapes and colors from other spirits. Interesting bottle designs can become sculptural elements even before they are lit.
Creative Alternatives:
- Small Lanterns: Mini decorative lanterns can be hung from the spokes, adding a different kind of rustic charm.
- LED Candles: For a flameless, safe option, especially for outdoor use, battery-operated LED candles inside jars or small decorative containers can provide a soft, ambient glow.
- Exposed Edison Bulbs: If you prefer a more industrial or minimalist look, simply use decorative Edison bulbs suspended directly from the wheel without any bottle or jar covering.
Remember, the type of bottle or jar you choose will significantly influence the overall light output and aesthetic. Experiment with different styles to find what best suits your vision for the perfect DIY wagon wheel light.
Bringing Light to Life: Electrical Components and Safety
Once you have your wheel and your chosen light vessels, it’s time to consider the electrical components. This step requires careful attention to detail and a strong emphasis on safety. If you’re not comfortable with basic wiring, it’s always advisable to consult a qualified electrician or seek assistance from someone experienced in electrical work.
Essential Components:
- Light Sockets: Choose sockets compatible with your desired bulb type (e.g., E26/E27 standard base).
- Electrical Wire: Appropriate gauge wire for lighting fixtures.
- Bulbs: Incandescent for a traditional warm glow, LED for energy efficiency and longevity (Edison-style LEDs are popular for their vintage look), or even smart bulbs for modern control.
- Dimmer Switch (Optional): Allows you to control the brightness, setting the perfect ambiance.
- Mounting Hardware: Chains, hooks, and ceiling canopy to suspend the chandelier securely.
- Tools: Wire strippers, pliers, screwdriver, drill, and possibly a bottle cutter if you’re modifying bottles.
Wiring Considerations:
Plan your wiring path carefully. You’ll typically run wires along the spokes or hidden within the wheel’s structure to each light source. Ensure all connections are secure and properly insulated to prevent hazards. Test your circuit before final assembly and installation. Safety is paramount when dealing with electricity.
Step-by-Step Conceptual Guide to Building Your Wagon Wheel Chandelier
While the exact steps may vary based on your specific design and materials, here’s a general outline for creating your stunning repurposed wagon wheel chandelier:
- Design and Plan: Sketch out your desired layout. Determine how many lights you want, where they will be positioned on the wheel, and how the wiring will run. Consider the weight distribution and how the chandelier will hang balanced.
- Prepare the Wheel: Clean, sand, and apply any desired finish (stain, paint, sealant) to your wagon wheel. Allow ample drying time.
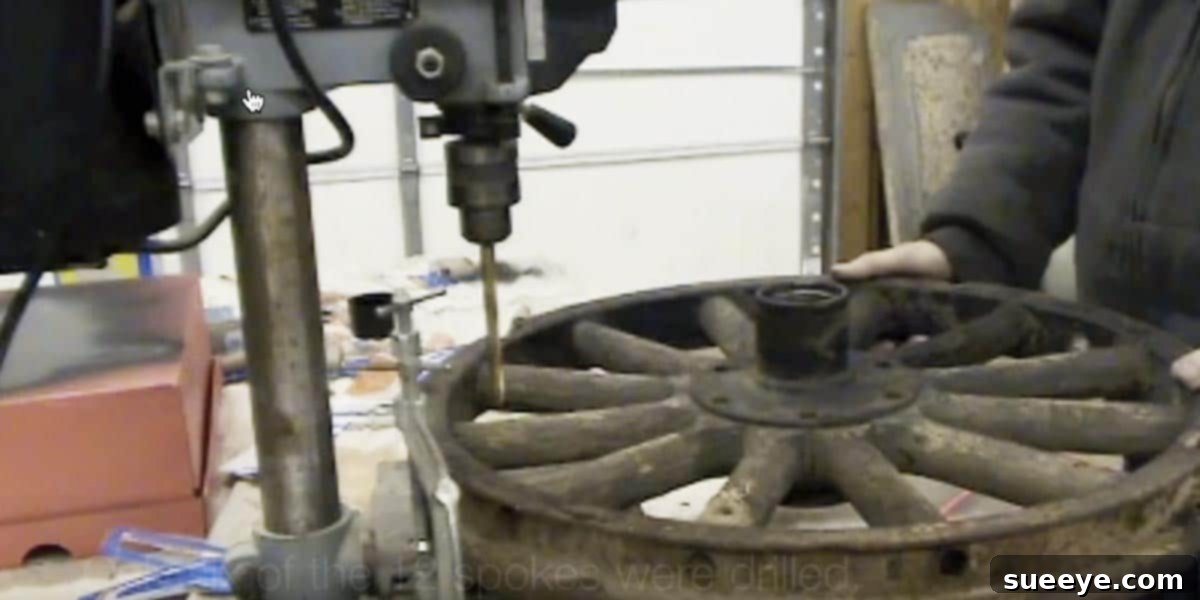
- Mark and Drill: Carefully mark the locations where your light sockets or bottle hangers will be attached. Drill pilot holes as needed. If using bottles, you might need to drill a hole for the light cord to pass through the bottle cap or directly into a cut bottle.
- Install Light Sockets: Securely attach the light sockets to the wheel. If using bottles/jars, you might integrate the socket into a modified lid or create a holder that suspends the bottle around the bulb.
- Wire the Lights: Run your electrical wire from a central point (where the main power supply will connect) to each light socket. Connect the wires according to standard electrical practices, ensuring proper polarity and insulation. Consider running the wires along the back or top of the spokes for a cleaner look.
- Secure Bottles/Jars: Attach your chosen bottles or jars. This could involve using metal clamps, strong adhesive, or custom-made holders that allow the bottles to hang or sit securely around the bulbs.
- Assemble Hanging Mechanism: Attach sturdy chains or ropes to the wheel, ensuring they are evenly spaced for balanced suspension. Connect these to a central hook that will attach to your ceiling canopy.
- Test the Lights: Before final installation, temporarily connect your chandelier to a power source (using a test cord if available) to ensure all lights are working correctly and there are no shorts.
- Install and Mount: Safely mount the ceiling canopy and hang your chandelier. Always ensure the ceiling fixture is robust enough to support the full weight of your chandelier.
This homemade chandelier project is incredibly rewarding, allowing you to showcase your creativity and craftsmanship.
Placement Ideas for Your Unique Wagon Wheel Chandelier
The versatility of a wagon wheel chandelier means it can enhance almost any space, bringing an immediate focal point and a cozy ambiance. Here are some ideal locations to consider:
- Entryways: Create a grand and welcoming first impression. The chandelier will draw the eye upward, setting a distinctive tone for your home.
- Dining Room Tables: Perfect for casting a warm, inviting glow over meals, transforming ordinary dinners into special occasions. Its rustic charm complements both casual and formal settings.
- Pool Tables or Game Rooms: Adds a fantastic, rugged touch, providing ample light for games and creating a relaxed atmosphere.
- Living Rooms: Serves as a stunning centerpiece, especially in rooms with high ceilings or an open-concept layout.
- Offices or Studies: Infuses a professional space with personality, offering a unique blend of vintage appeal and sophisticated design.
- Cabins or Rustic Retreats: This is arguably its natural habitat, perfectly enhancing the inherent charm of a log cabin or country home.
- Covered Patios or Outdoor Spaces: With proper weatherproofing and outdoor-rated electrical components, it can extend your rustic aesthetic to your exterior living areas.
Wherever you choose to hang your rustic lighting fixture, it’s guaranteed to create a perfectly natural and captivating look.
Maintaining the Beauty of Your Chandelier
Once installed, your wagon wheel chandelier will require minimal maintenance. Regularly dust the wheel and the light fixtures to keep them sparkling. For bottles or jars, a gentle wipe with a damp cloth will remove any buildup. Check electrical connections periodically, especially if the chandelier is in a high-traffic area or subject to vibrations. Replacing bulbs is straightforward, allowing you to easily refresh the lighting as needed.
Conclusion: A Timeless Project for a Unique Home
The journey of transforming an antique wagon wheel into a functional and beautiful chandelier is a testament to the enduring appeal of handcrafted decor. It’s an opportunity to embrace sustainable practices by giving an old object a new purpose, all while creating a truly unique statement piece for your home.
This unique lighting idea transcends fleeting trends, offering a timeless aesthetic that continues to charm and inspire. By following this guide and letting your creativity lead the way, you can craft a stunning wagon wheel chandelier that not only illuminates your space but also adds a rich layer of history, character, and unparalleled rustic elegance. So, gather your materials, embrace the DIY spirit, and embark on this rewarding project to create a cherished piece that will be admired for years to come!
Don’t forget to SHARE your creations and this inspiring project with your friends and fellow DIY enthusiasts on social media!