
6 Genius Home Improvement Hacks & DIY Tips for a Smarter Home
Are you ready to tackle home improvement projects with newfound confidence and efficiency? This comprehensive guide, inspired by the ingenious ideas from Hometalk on YouTube, brings you six truly surprising and incredibly simple hacks designed to streamline your DIY efforts. Whether you’re a seasoned DIY enthusiast or just starting out, these tips will not only save you time and money but also help you achieve professional-looking results with minimal fuss. Forget complex procedures and expensive tools; these brilliant home solutions are easy to implement, budget-friendly, and so practical, you’ll wonder how you ever managed without them. Prepare to transform your home more efficiently and neatly than you ever thought possible!
Essential Materials for These Ingenious DIY Hacks
Before you dive into these transformative home improvement projects, gather the following basic materials. Most of these items are likely already in your home or can be easily acquired at any hardware store, emphasizing the cost-effectiveness of these hacks.
- Clear Plastic bottle (various sizes)
- Cutter or Utility knife
- Heat gun (or hairdryer on high heat)
- Painter’s tape
- Caulk (and a caulk gun if not pre-loaded)
- Damp cloth or sponge
- Drill (with a small bit suitable for plastic)
- Bottle cap with a pre-drilled hole (or easily modifiable)
- Hot glue gun and glue sticks
- Vaseline petroleum jelly
- Small popsicle stick or craft stick
Step-by-Step Guide to These Revolutionary Home Hacks
Hack #1: The Ultimate Paint Pouring & Preservation Hack
Painting can be messy, and keeping leftover paint fresh can be a challenge. This hack offers a brilliant two-in-one solution for both clean pouring and extended paint preservation.
Step-by-Step Instructions:
- Select Your Bottle: Find a clear plastic bottle that is roughly the same diameter as your paint can. A standard soda bottle often works well.
- Prepare the Spout: Carefully cut off the top half of the plastic bottle. The goal is to create a funnel-like top that will fit snugly over the paint can’s opening.
- Form and Seal: Slip the cut plastic piece onto the top of your paint can, ensuring it fits securely around the rim. Using a heat gun (or even a powerful hairdryer on its highest setting), gently heat the sides of the plastic where it meets the can. This will allow the plastic to slightly melt and form a tight, custom seal around the can’s edges. Be cautious not to overheat or deform the plastic too much.
- Cool and Use: Allow the plastic to cool completely and harden into its new shape. Once cooled, you now have a perfectly formed spout that allows for neat and precise pouring, eliminating drips and spills down the side of the can.
- Preserve Your Paint: After pouring, simply place the original lid back onto the paint can, effectively sealing the paint from air exposure. The custom-fit plastic attachment helps create an extra barrier, keeping your paint fresh for much longer between uses. This not only prevents waste but also saves you money on future paint purchases.
Benefits: This ingenious method prevents paint from drying out prematurely, keeps the can’s rim clean, and ensures a smooth, mess-free pouring experience every time. It’s perfect for minimizing waste and maintaining paint quality.
Hack #2: Achieve Flawless Paint Lines on Textured Walls
Painting crisp, clean lines on rough or textured walls can be a painter’s nightmare due to paint bleed. This simple caulk trick is a game-changer for achieving professional-looking edges without the frustration.
Step-by-Step Instructions:
- Apply Painter’s Tape: Carefully apply painter’s tape along the edge where you want a clean line – for example, where a wall meets trim, another wall, or the ceiling. Press it down firmly to ensure good adhesion.
- Seal with Caulk: Take a tube of caulk and apply a very thin bead directly on top of the edge of the painter’s tape, where it meets the wall you intend to paint. This caulk will seep into any tiny gaps or textures beneath the tape, creating a perfect seal.
- Smooth and Wipe: Immediately after applying the caulk, use a damp cloth or your finger to gently wipe away any excess caulk and smooth the bead. You want just enough caulk to fill the micro-gaps without leaving a thick line.
- Paint the Wall: Once the caulk has dried (check the product’s instructions for drying time, but typically a few minutes is sufficient for a thin bead), begin painting the wall, starting from the taped edge and working inwards. The caulk barrier will prevent any paint from bleeding under the tape.
- Remove Tape Carefully: Before the paint is completely dry (while it’s still slightly tacky but not wet), carefully and slowly peel off the painter’s tape. This timing is crucial to prevent the paint from peeling with the tape, leaving you with an impeccably crisp, clean line.
Benefits: This technique is a secret weapon for achieving razor-sharp paint lines on even the most challenging textured surfaces. It eliminates frustrating bleed-through, saving you time on touch-ups and delivering a truly professional finish to your painting projects.
Hack #3: Revolutionize Your Painting with a DIY Brush Reservoir
Frequent dipping of your paintbrush into a can or tray can be tedious and time-consuming, especially for larger projects. This ingenious hack transforms your paintbrush into a continuous painting tool, making your work faster and more efficient.
Step-by-Step Instructions:
- Prepare the Brush: Choose a paintbrush suitable for your project. On the top side of the brush base (the metal ferrule where the bristles meet the handle), drill a small hole at an angle. The angle is important to facilitate paint flow. Ensure the hole is large enough to accept the nozzle of your chosen bottle cap.
- Attach the Cap: Fill the drilled hole with hot glue. Immediately press a plastic bottle cap (one with a hole in the center, or one you can easily pierce) into the hot glue, ensuring a secure and airtight seal. Allow the hot glue to dry completely and harden, creating a permanent attachment.
- Prepare the Paint Bottle: Fill a clean plastic bottle (a squeeze bottle works best) with the paint you will be using.
- Assemble and Paint: Screw the paint-filled bottle into the cap that you’ve affixed to your paintbrush. Now, as you paint, you can gently squeeze the bottle to feed paint directly into the bristles, providing a continuous supply. Paint as usual, enjoying the extended periods between refills.
Benefits: This clever modification makes painting significantly easier and faster, especially for larger surfaces. It reduces the need for constant dipping, minimizes drips, and lessens arm fatigue, allowing you to cover more area in less time with consistent paint application.
Hack #4: Never Forget Your Wall Paint Color Again
How many times have you needed to touch up a wall or repair a patch, only to realize you can’t remember the exact paint color, brand, or finish? This simple yet incredibly effective hack ensures you always have a perfect reference for future repairs.
Step-by-Step Instructions:
- Safely Remove Outlet Covers: Using a screwdriver, carefully remove the covers from your electrical outlets or light switches. Always exercise caution when working near electrical components.
- Document Information: On the backside (the part that faces the wall) of each outlet cover, use a permanent marker to clearly write down all essential paint information. This includes the exact name of the color, the brand of the paint, and the type of gloss or finish (e.g., eggshell, satin, matte).
- Add a Paint Sample: Dab a small amount of the actual paint onto the back of the cover. Allow it to dry completely. This physical sample will be invaluable for perfect color matching, especially if the paint name has changed or if you’re trying to match a custom tint.
- Reinstall Covers: Once the paint sample is dry and all information is recorded, carefully screw the outlet covers back into place.
- Future Reference: The next time you need to touch up your walls or repair a section, simply remove the corresponding outlet cover. All the information you need, including a true-to-life color swatch, will be readily available, saving you trips to the hardware store and ensuring a seamless repair.
Benefits: This hack eliminates guesswork and frustration, making future touch-ups and repairs incredibly easy. It’s a discreet, permanent, and perfectly matched reference that saves time, money, and ensures your home always looks its best.
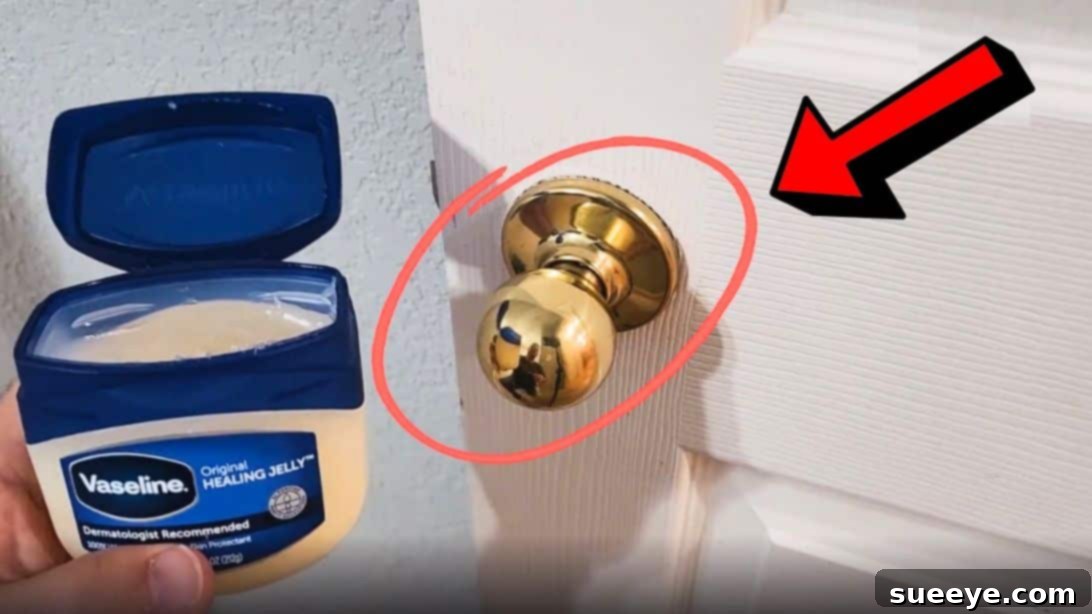
Hack #5: Keep Doorknobs Pristine with This Simple Trick
Doorknobs are high-traffic areas that quickly accumulate grime, fingerprints, and smudges, becoming notoriously difficult to keep clean. This hack offers a quick and easy way to protect them and simplify cleaning.
Step-by-Step Instructions:
- Clean the Doorknob: Start by cleaning your doorknobs thoroughly with your usual cleaner to remove any existing dirt, grease, or grime. Allow them to dry completely.
- Apply Vaseline: Grab a small amount of Vaseline petroleum jelly on your finger or a soft cloth. Rub a thin, even layer all over the surface of the doorknob, ensuring complete coverage.
- Buff (Optional): For a shinier finish, you can gently buff the doorknob with a clean, dry cloth after applying the Vaseline.
- Enjoy Protection: The Vaseline creates a protective barrier that repels water, liquids, and dirt. When any grime or liquid gets on the doorknob, it will simply sit on top of the Vaseline layer, making it much easier to wipe away with a damp cloth or tissue.
Benefits: This simple application of Vaseline keeps your doorknobs cleaner for longer, making them incredibly easy to wipe down. It helps maintain their shine, prevents tarnish on metal finishes, and reduces the effort required for regular cleaning, contributing to a more hygienic and presentable home.
Hack #6: Master Flawless Caulking with a Popsicle Stick
Achieving a smooth, professional-looking caulk bead can be tricky, often resulting in uneven or messy lines. This clever hack utilizes an everyday item to create perfect, aesthetically pleasing caulk joints, especially around tubs and sinks.
Step-by-Step Instructions:
- Prepare the Area: Ensure the surface where you’re applying caulk is clean, dry, and free of old caulk residue.
- Apply Caulk Bead: Apply a consistent bead of caulk into the gap you want to seal. Aim for an even thickness, but don’t worry too much about perfection at this stage.
- Smooth with Popsicle Stick: Immediately after applying the caulk, take a small popsicle stick (the curved end is ideal for this). Hold the stick at a slight angle and smoothly slide its curved end along the caulk bead. The popsicle stick’s gentle curve and flat surface will perfectly shape and smooth the caulk, removing excess and creating a clean, concave joint.
- Clean Excess: As you smooth, you might accumulate excess caulk on the popsicle stick. Have a damp cloth or paper towel handy to wipe off the excess frequently, ensuring a clean finish.
- Allow to Cure: Once you’ve smoothed the caulk, allow it to cure fully according to the caulk manufacturer’s instructions before exposing it to water or stress.
Benefits: This simple trick ensures a perfectly smooth, evenly curved caulk line every time, making your sealing projects look professional. It’s ideal for sealing gaps around bathtubs, sinks, countertops, and window frames, improving both the aesthetics and water resistance of your home.
*All image credit belongs to Hometalk via YouTube. Follow and subscribe to their channel for more inspiring DIY projects and home improvement ideas!
Elevate Your Home with These Smart DIY Solutions
These six brilliant home improvement hacks, courtesy of Hometalk, prove that you don’t need to be a professional or spend a fortune to make significant improvements to your living space. From simplifying messy painting tasks and ensuring flawless finishes to preserving your materials and keeping high-touch surfaces pristine, each tip is designed for maximum impact with minimal effort. By incorporating these smart, budget-friendly DIY solutions into your routine, you’ll not only enhance the aesthetics and functionality of your home but also boost your confidence in tackling future projects. Embrace these simple yet revolutionary tricks and enjoy a more efficient, neater, and smarter home today!