
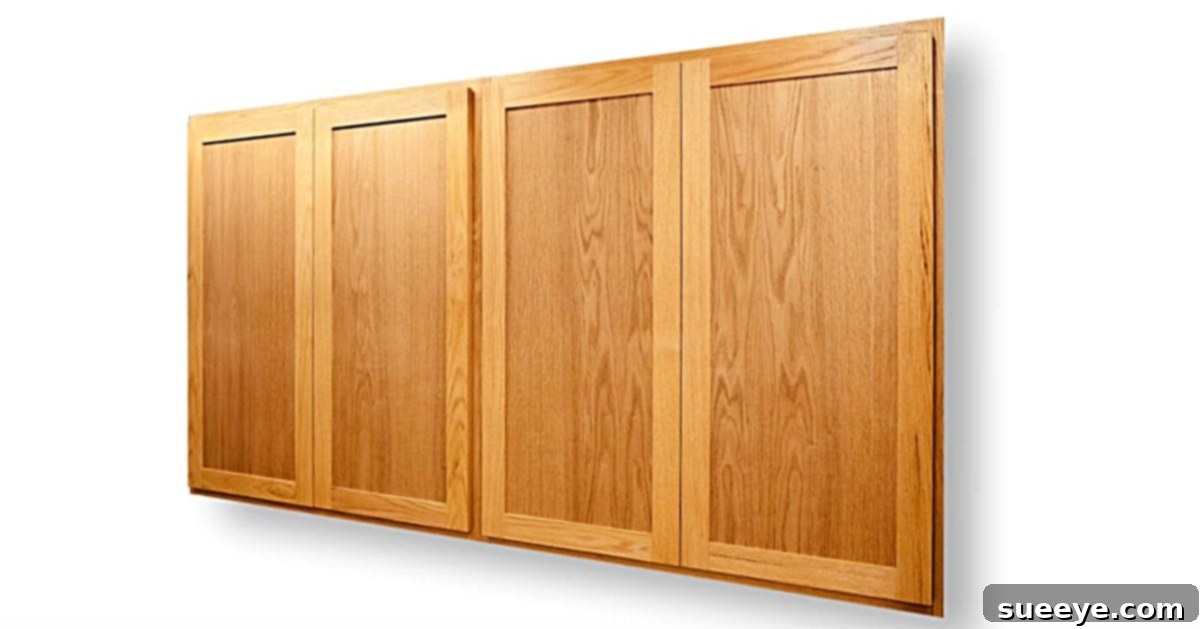
How To Make New Cabinet Doors
Every homeowner desires a space that is both functional and aesthetically pleasing, and for many, the garage often presents the biggest organizational challenge. In our home, my husband’s passion for woodworking had led to an impressive, yet sprawling, collection of tools. These tools, previously laid out on open shelves, created an unavoidable sense of disarray. My personal goal was two-fold: to bring a sense of order and neatness to the entire garage and, crucially, to establish my own dedicated space for crafting tools. This separation was vital to prevent any mix-ups and ensure every tool was always returned to its correct location. The search for a practical yet appealing solution led me to an ingenious cabinet door idea on YouTube. This wasn’t just about closing off shelves; it was about transforming them into highly efficient storage units with integrated organization. I instantly recognized it as the perfect answer to our ongoing dilemma and eagerly began gathering the necessary materials to build these fantastic cabinet doors for both our tool storage areas.
Why Embark on a DIY Cabinet Door Project?
Building your own cabinet doors, especially for utilitarian spaces like a garage or a dedicated craft room, offers far more than just a quick fix. It’s an investment in a customized solution that addresses specific needs and significantly enhances your workspace.
- Superior Organization: The most immediate benefit is the dramatic improvement in how organized your space becomes. By enclosing open shelving, you eliminate visual clutter. When you incorporate internal features like pegboard, you transform the inside of your doors into active storage, ensuring that frequently used tools are always within arm’s reach and properly stowed.
- Aesthetic Transformation: Open shelves filled with tools and supplies can often make a garage feel chaotic. Custom cabinet doors instantly elevate the appearance of your workspace, lending a clean, finished, and professional look that makes the entire area more inviting.
- Protection for Your Tools and Supplies: A garage environment can be harsh, exposing tools to dust, dirt, and humidity. Enclosed cabinet doors provide a vital protective barrier, safeguarding your valuable equipment and crafting materials from environmental damage, thus extending their lifespan.
- Tailored Customization: Unlike pre-made units, a DIY approach allows you complete control over dimensions, materials, and internal configurations. You can design doors that perfectly fit irregular spaces or incorporate specific storage solutions that cater precisely to your unique collection of tools or craft supplies.
- Budget-Friendly Solution: Constructing your own cabinet doors is often considerably more economical than purchasing custom-built units or even standard pre-fabricated cabinets. Utilizing common and affordable materials, you can achieve a high-quality, customized look without a hefty price tag.
- Personal Satisfaction and Skill Development: There’s a profound sense of achievement that comes from completing a woodworking project with your own hands. This endeavor not only yields practical benefits but also provides an opportunity to hone your DIY skills and enjoy the fruits of your labor.
Getting Started: Essential Planning for Your Cabinet Door Project
A successful DIY project always begins with thorough planning. This initial phase ensures precision, prevents costly mistakes, and sets the foundation for beautiful, functional cabinet doors.
Accurate Measurement is Paramount
Before any cutting begins, measure each cabinet opening meticulously. Take measurements for both height and width at multiple points (top, middle, bottom for width; left, center, right for height). Use the smallest of these measurements to calculate your door dimensions, allowing for a small gap (typically 1/8 inch) around the perimeter for smooth operation. Decide if your doors will be an overlay (covering the cabinet frame) or inset (fitting flush within the frame). For this project, an overlay style is generally simpler for DIYers.
Sketching Your Design
Put your ideas on paper! A simple sketch of your cabinet doors, noting their dimensions, hinge locations, and any internal features like pegboard panels, will serve as a valuable blueprint. This visual guide helps confirm material quantities and ensures clarity throughout the building process.
Selecting Your Wood and Materials
While specific materials are detailed below, consider the durability and aesthetic you desire. Plywood is excellent for panels due to its stability and affordability. For frames, common lumber like 1x2s provides ample strength. Think about the final finish – paint offers protection and a clean look, while stain can highlight natural wood grain.
Prioritizing Safety
Always prioritize safety when working with tools. Wear safety glasses to protect your eyes from sawdust and debris. Use hearing protection when operating loud machinery. Ensure your workspace is well-lit, clear of obstructions, and that you are familiar with the operation of all power tools before you begin.
Essential Materials for Crafting Your DIY Cabinet Doors
Having all your materials organized and ready before you start cutting will streamline the entire construction process. Here’s a detailed list of what you’ll need to build sturdy and functional cabinet doors.
- Wood:
- 1/4″ Plywood: This will form the core face of your cabinet doors. Its lightweight nature is ideal, and it provides a smooth surface that can be painted or stained. Its thickness is also suitable for being reinforced by a surrounding frame.
- 1 x 2 Wood Planks: These planks are crucial for building the structural frame of each door. They provide rigidity, a surface for attaching hinges, and give the door its substantial form. Common wood types like pine or fir are good, economical choices.
- Tools:
- A Drill: Indispensable for pre-drilling pilot holes (to prevent wood splitting) and for securely attaching hinges and other hardware.
- A Saw: A miter saw is excellent for precise 45-degree angle cuts for the frames, but a circular saw with a guide or even a good hand saw can also be used for cutting both planks and plywood.
- Measuring Tape & Pencil: For accurate marking and cutting. Precision here is key for well-fitting doors.
- Wood Clamps: Essential for holding glued joints firmly together while they dry and for securing pieces during assembly.
- Carpenter’s Square: To ensure all your frames and door panels are perfectly square, which is critical for doors that hang straight.
- Adhesives & Fasteners:
- Wood Glue: A strong wood glue is vital for creating robust joints that will stand the test of time. Apply generously to all mating surfaces.
- Wood Screws and/or Finish Nails: To reinforce the glued frame joints and to secure the plywood panel and pegboard to the frame. Choose appropriate lengths to avoid penetrating the other side of the wood.
- Peg Board: This material is a transformative element for these doors, allowing for interior storage. Select standard pegboard that can accommodate various hooks, making the inside of your doors a highly functional storage area.
- Hinges: Choose durable cabinet hinges that are appropriate for the size and weight of your doors. Butt hinges are a popular choice for their simplicity and reliability in overlay door applications.
- Optional Finishing Supplies: Sandpaper (various grits), wood filler, primer, paint or wood stain, clear protective topcoat (like polyurethane), cabinet handles/pulls, magnetic catches or roller catches.
Step-by-Step Guide to Crafting Your Custom Cabinet Doors
Follow these detailed instructions carefully to construct robust, functional, and attractive cabinet doors that will transform the organization and appearance of your garage or workspace. Patience and precision at each stage will yield the best results.
First, Precisely Build the Sturdy Frame for Each Cabinet Door
The foundation of a good cabinet door is its frame. Begin by taking the exact measurements of the designated wall space or cabinet opening. Cut your 1×2 wood planks to create the four sides of your door frame. For a clean and strong joint, cut the ends of each plank at a 45-degree angle (miter cuts), ensuring they form a perfect corner when joined. Apply a generous layer of wood glue to each mitered joint. Carefully align and clamp the pieces together, ensuring the frame is perfectly square using a carpenter’s square. Reinforce these glued joints with wood screws (pre-drilling pilot holes to prevent splitting) or finish nails. Allow the glue to dry completely according to the manufacturer’s instructions before proceeding, as this ensures maximum strength.
Next, Accurately Cut the Front Panels of Your Door from Plywood
Once your frames are solid and square, it’s time to prepare the visible front panels. Measure the inside dimensions of your constructed frame very carefully. Using these precise measurements, cut your 1/4″ plywood to fit snugly within the frame’s opening. This plywood panel will sit flush with one side of the frame, which will become the exterior face of your finished door. When cutting plywood, use a fine-tooth blade to minimize splintering, and consider applying masking tape along your cut lines for an even cleaner edge. Ensure your plywood piece is perfectly rectangular and fits without excessive gaps or forcing.
Then, Securely Attach the Plywood Front Panel into Your Frame
With both the frame and the plywood panel prepared, it’s time for assembly. Lay your wooden frame flat on a clean, stable workbench. Apply a continuous, even bead of wood glue along the inside edges of the frame where the plywood panel will rest. Carefully place the cut plywood panel onto the glue, ensuring it is perfectly aligned and flush with the desired front face of the frame. Use several clamps to apply firm, even pressure around the perimeter, holding the panel in place while the glue sets. For enhanced durability and a robust bond, drive small finish nails or short wood screws through the plywood into the frame, spacing them every 6-8 inches. Immediately wipe away any excess glue with a damp cloth to ensure a clean finish.
Optimizing Interior Storage: Seamlessly Integrating Pegboard
This innovative step is what truly sets these cabinet doors apart, transforming them into dynamic, multi-functional storage units. Once your plywood front panel is firmly attached and the glue has dried, flip the door over so the interior side is facing up. Measure the inside dimensions of the door frame once more, this time on the side that will face inward towards your shelves. Cut your pegboard to fit snugly within this internal space. To create a clean recess for the pegboard, you can attach thin furring strips (e.g., 1/4″ x 3/4″) around the inside perimeter of the frame. This creates a small ledge for the pegboard to rest on. Then, simply secure the pegboard to these strips or directly to the frame with small screws or brad nails. This strategic integration turns the inside of your door into valuable hanging space for frequently used hand tools, crafting instruments, or small containers, keeping your main shelves clear and your essentials at your fingertips.
Now, Skillfully Install Hinges onto Your Door for Smooth Operation
Proper hinge placement and installation are vital for cabinet doors that open and close effortlessly and remain perfectly aligned. Determine the ideal positions for your hinges; typically, two hinges are sufficient for most doors, positioned approximately 6 to 8 inches from the top and bottom edges. Mark these exact locations on the side edge of your door frame. If your chosen hinges require a mortise (a recessed cut for the hinge leaf to sit flush), carefully cut out this space using a sharp chisel or a router. For surface-mounted hinges, simply pre-drill pilot holes at your marked spots. Attach one half of each hinge securely to the door frame using the appropriate screws, ensuring they are perfectly straight and plumb. Always pre-drill pilot holes to prevent any wood splitting.
Finally, Mount Your Doors onto the Cabinet Structure and Ensure Alignment
This is the moment your hard work comes to fruition! Carefully position your new cabinet door within its opening. You may use shims or wedges to hold it in place and achieve the correct, even spacing around the perimeter. Have a helper assist you in holding the door perfectly level and steady. Transfer the corresponding hinge locations from the door to the cabinet frame or the adjacent wall structure where the door will be mounted. Pre-drill pilot holes at these marked points on the cabinet. Then, attach the other half of each hinge to the cabinet frame with screws. Gently open and close the door several times to check for smooth operation, proper clearance, and perfect alignment. Make any minor adjustments by slightly loosening and re-tightening hinge screws until the door swings freely, closes flush, and doesn’t bind or sag. Repeat this process for all the cabinet doors you’ve built.
Finishing Touches and Customization for Your DIY Cabinet Doors
Once your cabinet doors are securely hung and functioning smoothly, the final steps are all about personalization and protection. These finishing touches will enhance their aesthetic appeal and ensure their longevity in your workspace.
Thorough Sanding and Preparation
Before applying any finish, meticulously sand all surfaces of your newly built doors. Start with a medium-grit sandpaper (e.g., 120-grit) to smooth out any rough edges, splinters, or minor imperfections. Follow this with a finer grit (e.g., 220-grit) for a beautifully smooth, ready-to-finish surface. Proper sanding is crucial for achieving a professional look and ensuring even paint or stain absorption.
Painting or Staining for Durability and Style
Decide whether you prefer a painted finish for a clean, uniform look or a stained finish to showcase the natural beauty of the wood grain. For a garage or workshop, a durable semi-gloss or gloss paint is often recommended, as it’s easier to clean and more resistant to scuffs and moisture. If staining, apply a wood conditioner first to ensure even absorption, then apply your chosen stain. Always finish with several coats of a protective topcoat, such as polyurethane or a clear varnish, to seal the wood and provide maximum protection.
Adding Functional Hardware: Handles and Latches
Complete your cabinet doors by installing hardware that is both functional and complements your space. Choose handles or pulls that are comfortable to grip and align with the overall aesthetic of your garage or craft room. Install them at a height that is easily accessible. To ensure the doors stay securely closed, especially in a busy environment, consider adding magnetic catches or roller catches to the inside of the door frames. These provide a satisfying closure and prevent doors from swinging open inadvertently.
Maximizing Pegboard Potential
With the pegboard now integrated into the interior of your doors, it’s time to put it to work! Invest in a variety of pegboard hooks, small bins, and specialized holders. Arrange your most frequently used tools, small components, crafting brushes, or measuring devices on the pegboard for immediate access. This strategy keeps your main workbench clear and makes locating essential items incredibly efficient. Consider adding labels beneath items for even greater organization.
Maintaining Your Newly Organized Workspace
To ensure your custom cabinet doors and the organized system they facilitate continue to function flawlessly for years to come, a simple routine of maintenance is highly beneficial.
- Regular Cleaning: Periodically wipe down your cabinet doors to remove dust, grime, and any workshop debris. A soft cloth dampened with a mild all-purpose cleaner is usually sufficient for painted or sealed surfaces.
- Hardware Check-up: Over time, hinges and handles can loosen. Routinely inspect all screws on hinges, pulls, and latches, tightening them as needed. If hinges begin to squeak, a small drop of lubricant can restore smooth operation.
- Pegboard Organization: As your tool collection evolves, take a moment to reorganize your pegboard hooks and items. This ensures optimal efficiency and prevents clutter from creeping back in.
- Finish Touch-Ups: Should the paint or stain chip or scratch, perform small touch-ups promptly. This not only preserves the aesthetic appeal but also protects the underlying wood from moisture and wear.
Conclusion: Enjoy Your Organized, Efficient, and Beautiful Garage!
Bringing this DIY cabinet door project to completion has been an incredibly gratifying experience. What began as a simple desire for a neater garage and distinct storage for my crafting tools has culminated in a beautifully organized, highly functional workspace. The days of cluttered, open shelves are now a distant memory, replaced by sleek cabinet doors that not only conceal but also enhance storage with their integrated pegboard interiors. The transformation of our garage is truly remarkable; it now feels like a purposeful extension of our home, far removed from its previous chaotic state. The aesthetic upgrade is undeniable, and the personal satisfaction of having conceptualized and built these custom storage solutions myself is immense. I wholeheartedly encourage anyone struggling with workspace clutter to undertake this project. It is a practical, cost-effective, and deeply rewarding endeavor that will undoubtedly elevate your daily routines and bring lasting order to your creative or practical pursuits. Our garage looks absolutely awesome, and I couldn’t be happier with the outcome!