
Welcome, fellow DIY enthusiasts and home decor aficionados! If you, like me, find immense satisfaction in transforming humble materials into stunning, functional pieces for your home, then you’re in for a treat. Pallet wood projects hold a special place in my heart, and for good reason. Not only does this versatile material come at an unbeatable price point – completely free – but it also opens up a world of creative possibilities, allowing anyone to craft unique items that add character and utility to any space. Today, I’m thrilled to share an extraordinary DIY endeavor that beautifully marries rustic charm with unparalleled functionality: the DIY Rolling Storage Ottoman.
The Ultimate DIY Rolling Storage Ottoman: Style, Function, and Sustainable Crafting
In the quest for smarter living and more organized homes, ingenious solutions are always welcome. This project is a shining example of how resourceful crafting can meet practical needs. Imagine a stylish piece of furniture that not only serves as a comfortable footrest or extra seating but also discreetly tucks away clutter, all while being effortlessly movable. That’s precisely what this DIY pallet wood rolling storage ottoman delivers. It’s a fantastic addition to any living room, bedroom, or even a child’s play area, offering a dual-purpose design that makes daily life a little easier and a lot more stylish.
Why Choose Pallet Wood for Your Next DIY Project?
The allure of pallet wood goes far beyond its cost-effectiveness. It embodies a philosophy of sustainability and creativity, making it a favorite among crafters globally. Choosing pallet wood for your furniture and decor projects offers a multitude of benefits that resonate with both your wallet and your eco-conscious spirit.
-
Eco-Friendly & Sustainable: By repurposing wooden pallets, you’re actively participating in the reduce, reuse, recycle movement. You divert perfectly usable wood from landfills, reducing waste and minimizing the demand for new timber. This sustainable approach to crafting means you can create beautiful items with a clear conscience.
-
Free & Readily Available: This is arguably the biggest draw for many DIYers. Pallets are frequently discarded by businesses, construction sites, and warehouses. With a bit of polite inquiry, you can often acquire a plentiful supply of sturdy wood at no cost. This makes high-quality material accessible to everyone, enabling impressive projects without a hefty budget.
-
Unique Aesthetic & Character: Pallet wood often comes with a wonderfully weathered, distressed look that instant character and a rustic, industrial, or farmhouse vibe to any project. The imperfections, nail holes, and variations in grain tell a story, making your creation truly one-of-a-kind. No two pallet wood projects are ever exactly alike, ensuring your piece is authentically unique.
-
Remarkable Versatility: From robust furniture pieces like this ottoman to delicate home accents, garden planters, and striking wall art, the applications for pallet wood are virtually endless. Its inherent strength and adaptability make it suitable for a wide array of structural and decorative projects, limited only by your imagination.
-
Immense Satisfaction of Upcycling: There’s an unparalleled sense of accomplishment and pride in taking something discarded and transforming it into a beautiful, useful, and cherished item. The journey from raw, neglected wood to a finished masterpiece is incredibly rewarding, offering a deep connection to your craft.
Introducing the Pallet Wood Rolling Storage Ottoman: A Masterpiece of Functionality
My inspiration for this particular project stemmed from a dear friend’s home, where I first laid eyes on a similar creation. Her knack for crafty decor immediately captivated me, and the elegant yet practical presence of her ottoman convinced me that this was a project worth undertaking. If I do say so myself, my taste in decor is rather refined, and I knew instantly that this piece would be a cherished addition to my own living space – and potentially yours too! It seamlessly combines the rugged charm of reclaimed wood with intelligent design, resulting in an item that is both visually appealing and incredibly practical for modern living.
More Than Just a Seat: Unveiling the Multifaceted Benefits
What makes this DIY rolling storage ottoman truly exceptional is its remarkable versatility. It’s designed to seamlessly integrate into various aspects of your home life, offering a multitude of uses beyond its primary function. This piece isn’t just furniture; it’s a dynamic solution for common household needs.
-
Ample Hidden Storage: This is arguably the star feature. The spacious interior compartment is perfectly designed for stowing away a variety of items – from cozy blankets and throw pillows to magazines, remote controls, or even board games. For families with children, it becomes an invaluable treasure chest for toys, helping to keep playrooms or living areas tidy and clutter-free, making cleanup a breeze.
-
Comfortable Extra Seating: When unexpected guests arrive, or you simply need an additional spot to perch, the sturdy top, especially if upholstered with a plush cushion, provides comfortable and convenient seating. It’s a compact yet effective solution for maximizing your living space without compromising on style.
-
Convenient Footrest: After a long day, there’s nothing quite like putting your feet up and relaxing. This ottoman serves as an ideal footrest, enhancing your comfort while lounging on the sofa, armchair, or even a reading nook. Its perfect height makes it ergonomically comfortable for extended relaxation.
-
Effortless Mobility: Equipped with sturdy, high-quality casters, this ottoman can be smoothly rolled from one end of the room to another, or even effortlessly transitioned between rooms. Need to clear space for a quick yoga session? Roll it out of the way. Want to bring snacks or drinks closer to the couch during a movie night? Simply glide it over. This feature adds an incredible layer of convenience and adaptability to your living environment.
-
Stylish Accent Piece: Beyond its utilitarian functions, the pallet wood ottoman brings a distinct touch of handcrafted artistry and rustic warmth to your decor. Its natural wood grain, coupled with the potential for custom finishes, allows it to complement a wide range of interior styles, from modern farmhouse and industrial chic to bohemian and minimalist aesthetics. It’s a true conversation starter that reflects your personal style.
What You’ll Need: Tools and Materials for Your Pallet Ottoman Project
Embarking on any DIY project requires the right set of tools and materials to ensure both safety and success. While specific dimensions and quantities will naturally depend on your desired ottoman size, here’s a comprehensive list to get you started on your pallet wood rolling storage ottoman. Remember, prioritizing safety is paramount; always wear appropriate protective gear, including safety glasses and gloves.
Essential Tools:
-
Pallet Breaker Tool or Pry Bar & Hammer: Crucial for safely and efficiently dismantling pallets while minimizing wood damage.
-
Measuring Tape & Pencil: For making precise measurements and accurate markings before cutting.
-
Circular Saw or Miter Saw: Essential for making clean, straight, and precise cuts of your pallet planks to desired lengths.
-
Drill/Driver: Used for pre-drilling pilot holes (to prevent wood splitting) and for driving screws securely.
-
Sander (Orbital or Belt) & Sandpaper: Absolutely vital for smoothing rough edges, removing splinters, and preparing the wood surface for finishing treatments like staining or painting.
-
Wood Glue: For enhancing the strength and stability of your joints, creating a more durable piece of furniture.
-
Wood Clamps: To hold pieces firmly together while glue dries, ensuring strong and precise bonds.
-
Staple Gun (if upholstering): Indispensable for neatly and securely attaching upholstery fabric to the lid cushion.
-
Safety Glasses & Work Gloves: Non-negotiable safety items to protect your eyes and hands from debris and splinters.
Key Materials:
-
Wooden Pallets (3-5 depending on size): Source carefully, prioritizing those stamped with “HT” (heat-treated) and avoiding those marked “MB” (methyl bromide, chemically treated).
-
Wood Screws (various lengths): Choose exterior-grade screws for superior durability and resistance to rust, especially if the ottoman might be exposed to humidity.
-
Casters (4, ideally with brakes): Heavy-duty casters are essential to support the weight of the ottoman and its contents, while brakes prevent unwanted movement.
-
Plywood (for base and lid frame): A good quality sheet of plywood will provide a stable and flat surface for the bottom of the storage compartment and the lid’s foundation.
-
Wood Stain or Paint & Sealer: To protect the wood from wear and moisture, and to enhance its natural beauty or customize its appearance to match your decor.
-
Upholstery Foam (for lid cushion): For creating a comfortable and resilient top cushion, varying in thickness based on desired plushness.
-
Fabric (for lid cushion): Select a durable upholstery fabric of your choice, considering both aesthetics and longevity.
-
Hinges (for lid): Sturdy hinges are necessary to allow the lid to open and close smoothly and securely, providing easy access to the storage compartment.
Step-by-Step Guide: Building Your Pallet Wood Rolling Storage Ottoman
Crafting this versatile ottoman is a rewarding process that combines basic woodworking skills with a touch of personal creativity. While a detailed visual tutorial would be ideal, the following steps outline the general construction process, providing you with a clear roadmap to create your own functional masterpiece. Each stage is crucial for ensuring a sturdy, beautiful, and long-lasting piece of furniture.
Step 1: Sourcing and Preparing Your Pallet Wood
Begin by diligently acquiring enough heat-treated (HT) pallets, ensuring they are free from excessive damage or chemical treatment. Once you have your pallets, the initial, often arduous, but essential task of dismantling them begins. Utilize a specialized pallet breaker tool or a combination of a pry bar and hammer to carefully separate the planks from the stringers. Take your time during this process to minimize splitting and save as much usable wood as possible. After dismantling, clean the wood thoroughly, removing any dirt, debris, or embedded nails. Inspect each plank for structural integrity, opting to use the best pieces for visible surfaces and planning your cuts to avoid heavily damaged sections.
Step 2: Designing Your Ottoman and Making Initial Cuts
Before making any cuts, clearly decide on the overall dimensions of your ottoman. Consider the specific space it will occupy and the amount of storage you desire. Common sizes range from a compact 20×20 inches for a small accent piece to a more substantial 30×40 inches for a primary living room ottoman. Once your dimensions are finalized, accurately measure and mark your pallet planks. You’ll need pieces for the four sides of the frame, and potentially for a decorative top frame if you’re planning to upholster the lid separately. Use your circular or miter saw to make precise, square cuts, ensuring all pieces are dimensionally consistent.
Step 3: Assembling the Ottoman Frame
Start by constructing the rectangular or square base frame. Apply wood glue to the joining surfaces and use screws to firmly attach the side pieces, ensuring they are perfectly square using a speed square or framing square. For enhanced structural integrity, consider adding internal corner braces. Once the base frame is solid, proceed to attach the vertical side panels. These can consist of solid, wider planks or multiple narrower planks arranged vertically to create the robust walls of your ottoman. Again, apply wood glue to all mating surfaces and secure with screws, always pre-drilling pilot holes to prevent the pallet wood from splitting. Verify that all joins are strong, flush, and level.
Step 4: Constructing the Base and Lid
For the bottom of the storage compartment, cut a piece of sturdy plywood to fit snugly inside your assembled frame. Secure it in place with screws driven from the outside of the frame, or by first attaching small support ledges on the inside for the plywood to rest upon.
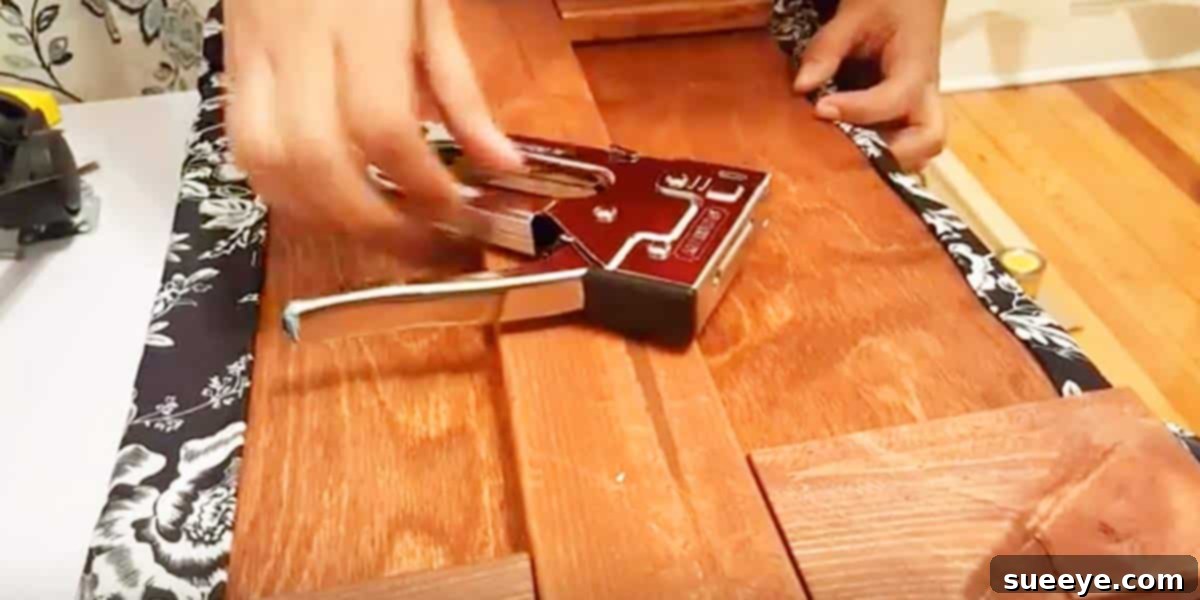
For the lid, you have a few aesthetic and functional options. You could craft a solid wood lid from more pallet planks, joining them together with battens on the underside for stability. Alternatively, and highly recommended for a comfortable storage ottoman, you can create an upholstered lid. Cut a piece of plywood for the lid base. Affix a layer of high-density upholstery foam to the plywood, then carefully cover it with your chosen durable fabric, securing it neatly and tightly with a staple gun on the underside. Ensure the fabric is taut and smooth.
Step 5: Incorporating Mobility: Attaching Casters and Hinges
Carefully flip your ottoman frame upside down. Position the heavy-duty casters near each corner of the base, ensuring they are set back slightly from the edges to prevent accidental snagging. Mark and pre-drill holes, then securely attach the casters using appropriate screws that penetrate well into the wood. If your casters have brakes, ensure they are easily accessible.
If you’ve opted for a hinged lid, carefully position your hinges along one chosen edge of the ottoman frame and the corresponding edge of the lid. Ensure they are evenly spaced and aligned perfectly to allow the lid to open and close smoothly without binding or wobbling. Attach them securely with screws, making sure they are firmly embedded.
Step 6: Finishing Touches: Sanding, Staining, and Sealing
This final step is crucial for both the aesthetic appeal and long-term durability of your ottoman. Thoroughly sand all surfaces of your pallet wood ottoman. Begin with a coarser grit sandpaper (e.g., 80-100 grit) to smooth out rough spots, remove splinters, and level imperfections. Gradually move to finer grits (e.g., 150-220 grit) for a silky smooth, touchable finish. Once sanding is complete, meticulously wipe down the entire piece to remove all dust and debris.
Now comes the artistic part: applying your chosen finish. You can stain the wood to enhance its natural grain and impart a specific hue (e.g., dark walnut for a classic look, gray wash for a coastal vibe), paint it to perfectly match your existing decor, or simply apply a clear sealer for a raw, natural, yet protected appearance. Apply several thin, even coats, diligently following the manufacturer’s instructions for drying times between coats. A good quality protective sealer (such as polyurethane, lacquer, or a durable clear coat) will effectively shield the wood from moisture, spills, and everyday wear and tear, ensuring your beautiful ottoman lasts for many years to come.
Customizing Your Pallet Ottoman: Personal Touches and Variations
One of the greatest joys of DIY is the inherent freedom to personalize your creation, making it truly your own. Your pallet wood rolling storage ottoman can be as unique as your imagination allows, reflecting your personal style and complementing your home’s aesthetic perfectly.
-
Finish Variations: Do not hesitate to experiment with different wood stains – a rich dark walnut can create a classic, elegant look, while a light gray wash might evoke a breezy coastal vibe. For a shabby chic feel, consider a distressed white paint. You could also opt for a dynamic two-tone finish, perhaps painting the frame and staining the lid for contrast.
-
Upholstery Fabric: The choice of fabric for the lid cushion can dramatically alter the ottoman’s overall character. Opt for a luxurious velvet for a touch of elegance, a durable canvas for a more casual and resilient look, or a bold patterned fabric to make a vibrant statement piece. Faux leather can lend an industrial edge, while linen offers a natural, refined texture.
-
Hardware Selection: Consider adding decorative handles or pulls to the lid for easier opening, or even choose unique caster styles (e.g., vintage-inspired, industrial metal) to further enhance its aesthetic appeal and mobility.
-
Size and Shape Modifications: While a rectangular shape is common and highly versatile, don’t shy away from building a square ottoman for a more symmetrical look, or even a smaller, more compact version that’s perfect for a child’s room or a cozy reading nook.
-
Interior Lining Options: For a truly refined and finished interior, you could choose to line the storage compartment. Options include adding a fabric lining, thin plywood panels, or even felt to protect stored items and prevent splinters.
Beyond the Ottoman: Inspiring Pallet Wood Project Ideas
Once you’ve experienced the immense satisfaction of creating this fantastic pallet wood rolling storage ottoman, you might find yourself delightfully hooked on pallet wood projects! The possibilities for transformation are truly endless, offering a sustainable and creative outlet. Here are a few more inspiring ideas to spark your next creative endeavor:
-
Rustic Coffee Tables: Design and build a charming coffee table with integrated storage shelves or even a clever lift-top mechanism for added functionality.
-
Charming Wall Art & Signs: Simple pallet planks can be beautifully transformed into personalized, rustic signs or textured wall art pieces that add character to any room.
-
Sustainable Garden Planters & Vertical Gardens: Pallets are incredibly versatile for creating tiered garden planters, raised garden beds, or innovative vertical herb gardens, maximizing growing space.
-
Sturdy Bookshelves & Shelving Units: Craft robust and characterful bookshelves or custom shelving units that offer practical storage and display solutions for any room in your home.
-
Durable Outdoor Furniture: From comfortable lounge chairs and benches to complete dining sets, pallet wood can be repurposed to create durable and stylish outdoor furniture pieces, perfect for patios and decks.
Embark on Your DIY Journey Today!
I genuinely hope this detailed guide has thoroughly inspired you to dive into the wonderful world of pallet wood projects and confidently tackle this incredible DIY rolling storage ottoman. It’s truly more than just a piece of furniture; it’s a profound statement of creativity, resourcefulness, and intelligent, practical design. The immense satisfaction of crafting something both beautiful and incredibly functional with your own hands, especially from repurposed materials, is an experience that is truly unparalleled. So, gather your tools, conscientiously source your pallets, and get ready to add a truly unique, immensely useful, and personally crafted piece to your home decor. Happy crafting!