
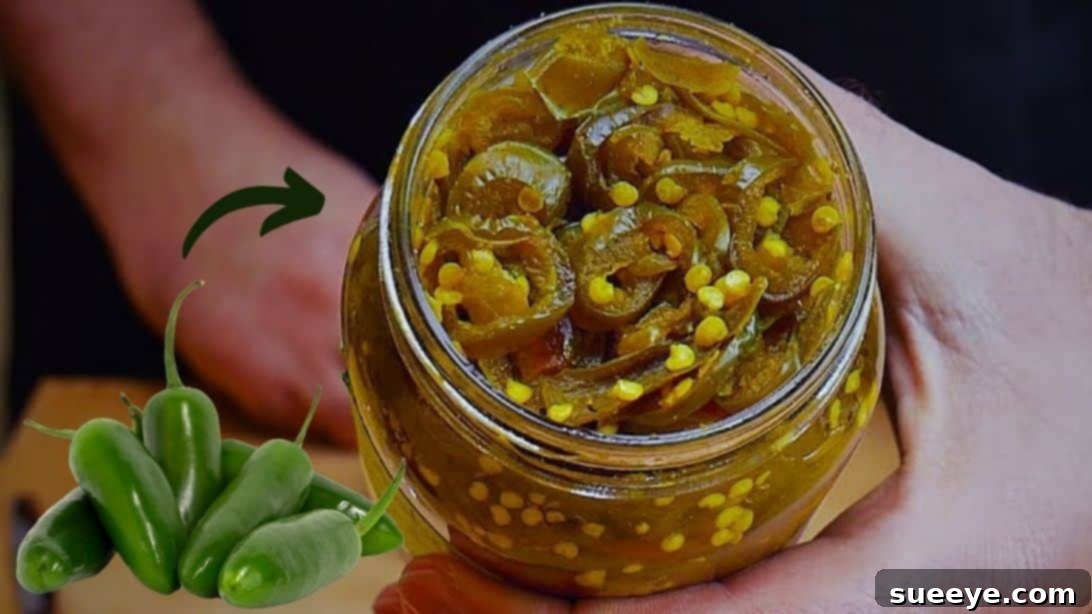
Prepare to tantalize your taste buds with a truly unique culinary creation: Cowboy Candy! If you haven’t encountered these delightful treats before, allow us to introduce you to the magic of candied jalapenos. Imagine the perfect harmony of sweet, spicy, and tangy, all packed into a single bite-sized pepper slice. These irresistible morsels are not just a snack; they are a versatile condiment that can transform ordinary meals into extraordinary experiences. Whether you’re adding a fiery kick to your salads, a sweet tang to your hamburgers, or a surprising twist to your charcuterie board, cowboy candy delivers an unparalleled flavor punch.
Beyond their incredible taste, one of the greatest advantages of making cowboy candy is its impressive shelf life. Properly prepared and canned, these candied jalapenos can be stored and enjoyed for several months, making them an excellent pantry staple and a fantastic homemade gift. While the process of making them requires a bit of attention, the joy and satisfaction of having a jar (or several!) on hand far outweigh the effort. Plus, the rewarding flavor makes every minute spent in the kitchen worthwhile.
In this comprehensive guide, we’ll walk you through everything you need to know to create your own batch of perfect homemade cowboy candy. We’ll cover essential ingredients, provide a detailed step-by-step recipe, share expert tips for success, and explore creative ways to incorporate these candied wonders into your culinary repertoire. Let ChilliChump via YouTube be your guide as we embark on this delicious journey to master the art of making quick and easy candied jalapenos.
Why You’ll Love Homemade Cowboy Candy
There’s a reason cowboy candy has garnered such a dedicated following. Its complex flavor profile offers something for everyone, from the adventurous foodie to the home cook looking to add a gourmet touch to everyday dishes. Here are just a few reasons why this recipe deserves a permanent spot in your kitchen:
- Unforgettable Flavor: The combination of fiery jalapenos, sweet sugar, and tangy cider vinegar creates a flavor explosion that is both addictive and surprisingly balanced. The cooking process mellows the heat of the peppers while infusing them with rich, syrupy sweetness.
- Incredible Versatility: From savory to sweet applications, cowboy candy proves its worth time and again. Imagine them diced and mixed into a vibrant salsa, layered onto a gourmet grilled cheese sandwich, or even accompanying a scoop of vanilla ice cream for a truly audacious dessert.
- Perfect for Preserving: If you find yourself with an abundance of garden-fresh jalapenos, this recipe offers an excellent way to preserve their deliciousness long after the growing season ends. It’s a practical and rewarding method of food preservation.
- Thoughtful Homemade Gifts: A beautifully labeled jar of homemade cowboy candy makes a unique and cherished gift for friends, family, and neighbors. It’s a personal touch that truly stands out.
- Elevate Everyday Meals: A spoonful of cowboy candy can elevate simple dishes like scrambled eggs, mac and cheese, or even a plain bowl of rice. It’s an instant flavor booster.
Essential Ingredients for Candied Jalapenos
Crafting the perfect batch of cowboy candy begins with selecting high-quality ingredients. Each component plays a crucial role in achieving that signature sweet, spicy, and tangy flavor. Here’s what you’ll need:
- 3 lbs. Jalapenos, fresh and firm (Choose peppers that are vibrant green, firm to the touch, and free of blemishes. Freshness is key for both flavor and texture.)
- 2 cups Cider vinegar (This adds the essential tangy element and contributes to the pickling process, ensuring proper preservation.)
- 6 cups Granulated sugar (The star of the candying process, sugar creates the rich, thick syrup and balances the heat of the jalapenos.)
- 1⁄2 teaspoon Turmeric (Adds a subtle earthy note and contributes to the beautiful golden hue of the syrup and peppers.)
- 1⁄2 teaspoon Celery seed (Offers a mild, savory, and slightly peppery flavor that complements the other spices beautifully.)
- 3 teaspoons Granulated garlic (Enhances the savory depth, providing a pungent aromatic foundation to the sweet and spicy elements.)
- 1 teaspoon Cayenne pepper, ground (For an extra layer of heat and a robust spicy kick. Adjust to your preference – omit for milder, add more for hotter.)
You’ll also need specialized equipment for canning:
- Canning Jars (Sterilized and ready for use. Mason jars with new lids and rings are ideal for safe preservation.)
- Large Pot or Water Bath Canner (Essential for the final processing stage to ensure shelf stability.)
- Tongs or Jar Lifter
- Cooling Rack
- Slotted Spoon
- Gloves (Crucial for handling jalapenos to prevent capsaicin burns.)
Step-by-Step Guide to Making Cowboy Candy
Follow these detailed instructions carefully to ensure a delicious and safely preserved batch of homemade cowboy candy. Precision in timing and technique is key for the best results.
Step 1: Prepare the Jalapenos and Syrup Base
Before you begin, ensure you’re wearing a pair of protective gloves to prevent skin irritation from the capsaicin in the jalapenos. Start by thoroughly washing each jalapeno pepper. Carefully remove the stems, then slice the peppers into uniform rounds. Aim for a thickness of approximately 1/8 to ¼ inch. Uniformity in size ensures even cooking and a consistent texture in your final product. If you have a food processor with a slicing attachment, this can significantly speed up the process and ensure perfectly even cuts. Once sliced, set the jalapenos aside.
Next, place a large, heavy-bottomed pot on your stovetop over medium-high heat. Pour in the cider vinegar, granulated sugar, turmeric, celery seed, granulated garlic, and ground cayenne pepper. Stir the mixture gently until the sugar begins to dissolve. Bring this mixture to a full rolling boil, then immediately reduce the heat to a gentle simmer. Allow the syrup to simmer for about 5 minutes, stirring occasionally, to allow the flavors to meld and the sugar to fully dissolve, creating a cohesive base for your peppers.
Step 2: Cook Peppers and Prepare Jars
Carefully add the sliced jalapeno peppers to the simmering syrup in the pot. Stir gently to ensure all peppers are submerged and coated. Allow the peppers to simmer in the syrup for exactly 4 minutes. This precise timing is crucial; you want the peppers to soften slightly and absorb the syrup’s flavors without becoming overly soft or mushy. They should retain a slight bite.
Using a slotted spoon, carefully transfer the softened jalapeno slices from the pot into your pre-sterilized and clean canning jars. Pack them snugly but avoid crushing. Fill each jar up to approximately ¼ inch from the upper rim, which is known as the headspace. Leave the remaining syrup in the pot.
Now, increase the heat under the pot, bringing the reserved syrup to a vigorous, full rolling boil. Let it boil hard for about 6 minutes. This step thickens the syrup, which is essential for proper preservation and the desired candy-like consistency. While the syrup is boiling, take a cooking chopstick or a popsicle stick and insert it gently into the bottom of each jar, moving it two to three times. This helps to release any trapped air pockets, ensuring a better seal and proper processing.
Once the syrup has boiled for 6 minutes, carefully pour the boiling syrup evenly over the jalapeno peppers in each jar, maintaining the ¼-inch headspace. Wipe the rims of each jar thoroughly with a clean, damp towel to remove any sticky residue. This ensures a clean surface for the lids to seal properly. Place the new, sterile lids onto the jars, followed by the rings, and tighten them to fingertip tightness (just until resistance is met).
Step 3: Water Bath Canning and Cooling
Prepare your water bath canner (or a very large pot with a lid). Place a canning rack or a clean towel/cloth at the bottom of the canner to prevent the jars from touching the bottom directly and breaking. Carefully place the filled and sealed jars into the canner. Add enough water to the canner so that the jars are covered by at least 1-2 inches of water, up to their rims. Cover the canner with its lid.
Bring the water in the canner to a full, rolling boil. Once it reaches a vigorous boil, set a timer for 10 to 15 minutes. The processing time can vary slightly depending on your altitude; consult a reliable canning guide for specific adjustments if you live at high altitudes.
Once the timer goes off, carefully remove the jars from the canner using tongs or a jar lifter. Place them upright on a cooling rack or a towel-lined countertop, ensuring there’s space between each jar. Leave them undisturbed to cool completely for 24 hours. You might hear popping sounds as the lids seal – this is a good sign! Do not disturb the jars or try to tighten the rings during this cooling period.
After 24 hours, check the seals. The center of each lid should be concave and not flex when pressed. If any jar did not seal, refrigerate it and consume it within 2-3 weeks. For properly sealed jars, wipe them clean with a damp cloth to remove any sticky residue, then label them with the date. While you can technically consume them immediately upon cooling, allowing your cowboy candy to mellow for at least 2 weeks (and ideally up to 1 month) before eating significantly enhances their flavor. This mellowing period allows the peppers to fully absorb the syrup and develop a deeper, more complex taste profile.
Creative Ways to Enjoy Your Homemade Cowboy Candy
The versatility of cowboy candy is truly astounding! Once you have your jars of sweet and spicy goodness, the culinary possibilities are endless. Here are some fantastic ideas to inspire you:
- Classic Pairings: Serve them alongside cream cheese and crackers for an easy and impressive appetizer. They’re also phenomenal with cornbread, grilled cheese, or as a vibrant topping for hot dogs and sausages.
- Elevate Your Proteins: Chop them finely and add to marinades for chicken, pork, or even fish. Use them as a glaze for grilled ribs, baked ham, or roasted chicken, imparting a sweet, sticky, and spicy crust.
- Sandwiches and Burgers: Forget boring pickles! A few slices of cowboy candy on your next burger or pulled pork sandwich will provide an explosion of flavor and texture.
- Salads and Bowls: Dice them and toss into green salads, pasta salads, or grain bowls for an unexpected burst of flavor. They pair wonderfully with a vinaigrette dressing.
- Dips and Spreads: Blend them into cream cheese for a delectable spread, or mix into guacamole or hummus for an exciting twist.
- Charcuterie Boards: They add a pop of color, sweetness, and heat to any cheese and meat platter, complementing both mild cheeses and robust cured meats.
- Unexpected Delights: Don’t be afraid to experiment! Try them chopped in a spicy chocolate bark, or even as a garnish for craft cocktails.
Don’t Waste the Leftover Syrup: Liquid Gold!
After you’ve jarred your candied jalapenos, you’ll be left with a beautiful, flavorful syrup. Do not discard it! This “jalapeno simple syrup” is liquid gold, imbued with all the sweet, spicy, and tangy essence of your cowboy candy. Transfer the leftover syrup into clean jars and refrigerate. It can be stored for several weeks and used in countless ways:
- Glaze for Meats: Brush it onto grilled chicken, pork chops, or ribs during the last few minutes of cooking for a sweet and spicy glaze.
- Salad Dressing Base: Whisk it into olive oil and vinegar for a unique vinaigrette.
- Cocktail Mixer: Add a splash to margaritas, Moscow mules, or even a spicy lemonade for an adult beverage with a kick.
- Flavor Enhancer: Drizzle it over cream cheese, mix it into potato salad, or add a spoonful to baked beans for an unexpected depth of flavor.
- Dessert Drizzle: A daring drizzle over vanilla ice cream or pound cake can create an adventurous dessert experience.
Tips for Perfect Homemade Candied Jalapenos
Achieving consistently delicious cowboy candy involves a few key considerations. Keep these tips in mind to ensure your batch turns out perfectly every time:
- Gloves, Gloves, Gloves: This cannot be stressed enough. Capsaicin, the compound that makes peppers spicy, can cause severe skin irritation and burning. Always wear gloves when handling jalapenos, especially when slicing. Avoid touching your face or eyes.
- Uniform Slicing: Aim for consistent thickness (1/8 to ¼ inch) for your jalapeno slices. This ensures they cook evenly and have a uniform texture.
- Sterilize Your Jars: Proper sterilization of canning jars, lids, and rings is paramount for safe food preservation and to prevent spoilage.
- Don’t Overcook the Peppers: The 4-minute simmer for the peppers is crucial. Overcooking will result in mushy jalapenos, losing their desirable crisp-tender texture.
- Achieve a Proper Seal: Follow the water bath canning instructions meticulously. A proper seal is indicated by the lid being concave and not flexing when pressed. This ensures your cowboy candy is shelf-stable.
- Adjust Spice Levels: If you prefer a milder candy, you can remove some or all of the seeds and membranes from the jalapenos before slicing (this is where most of the heat resides). For extra heat, increase the amount of cayenne pepper or even add a pinch of red pepper flakes.
- Mellowing Time is Worth It: While tempting to eat immediately, the two-week to one-month mellowing period truly allows the flavors to deepen and harmonize, resulting in a more complex and satisfying taste.
Frequently Asked Questions About Cowboy Candy
Here are answers to some common questions about making and enjoying cowboy candy:
- Q: Can I use other types of peppers?
- A: While jalapenos are traditional, you can experiment with other medium-heat peppers like serranos (for more heat) or even milder varieties like poblano peppers for a different flavor profile. The cooking times might need slight adjustment.
- Q: How long does homemade cowboy candy last?
- A: Properly water-bath canned and sealed jars can last for up to one year in a cool, dark pantry. Once opened, they should be stored in the refrigerator and consumed within 2-3 weeks. Uncanned cowboy candy, stored in the refrigerator, will last about 2-3 weeks.
- Q: Why do they need to mellow for 2 weeks?
- A: The mellowing period allows the jalapenos to fully absorb the sweet and tangy syrup, and for all the flavors to deepen, meld, and achieve their full potential. This results in a more balanced and complex taste that is far superior to candy eaten immediately after preparation.
- Q: What if I don’t have canning jars or a water bath canner?
- A: You can still make cowboy candy! Simply follow the recipe up to the point of filling the jars, then store the non-canned jars in the refrigerator. They will last for about 2-3 weeks. For longer storage, canning is recommended.
- Q: My syrup isn’t as thick as I’d like. What went wrong?
- A: The most common reason for thin syrup is not boiling it long enough in Step 2. Ensure you bring the syrup to a full, rolling boil and let it boil hard for the specified 6 minutes to allow it to reduce and thicken properly. You can also re-boil leftover syrup to thicken it further if needed for separate use.
- Q: Can I make a larger or smaller batch?
- A: Yes, this recipe is easily scalable. Simply adjust all ingredient quantities proportionally. Remember that cooking times for the peppers and syrup reduction might vary slightly with significantly larger batches.
The Ultimate Homemade Cowboy Candy Recipe
Embrace the vibrant flavors and rewarding process of making your own cowboy candy. This recipe offers a fantastic way to enjoy and preserve the humble jalapeno, transforming it into a gourmet delight that will impress everyone who tries it. So, gather your ingredients, put on your gloves, and get ready to create a batch of these unforgettable sweet and spicy treasures. Happy canning!
*These amazing images and the foundational recipe inspiration are all credited to ChilliChump via YouTube. We highly recommend checking out his other videos and following for more fantastic culinary insights and recipes!